|
"Derby",
lastly, had two field applied "towel bars"
welded on each side of the Turret to stow
kitbags and sacks. I modeled these with
lengths of .030" solder, super glued in
place and welds made with texture gel
medium.
In the
photos, it appears that "Derby" had solid
Idler Wheels fitted. I replaced the
open-spoked Italeri parts with items from
Tamiya's M4 Sherman kit #35190. They fit
well on the Italeri plugs, but are a little
loose. I'd also wind up using the poly-vinyl
tracks from the Tamiya kit too - and they
actually held the Idler Wheels in place
nicely.
"Derby"
- Painting & Markings
To
ensure paint coverage during joining of
sub-assemblies in this project, I painted as
I progressed. This only calls for a little
pre-planning and good choice in bonding
agents as you move through the modeling
project. I opt to go with 5-minute epoxy as
much as the traditional super glue method to
bond dissimilar materials like photoetch to
plastic/resin, or resin to plastic. The
differentiate between the two being strength
and speed of the bond called for. The
pre-painting (priming) also helps to catch
air bubbles in the resin parts before you
get too far along in the assembly process to
comfortably address these flaws.
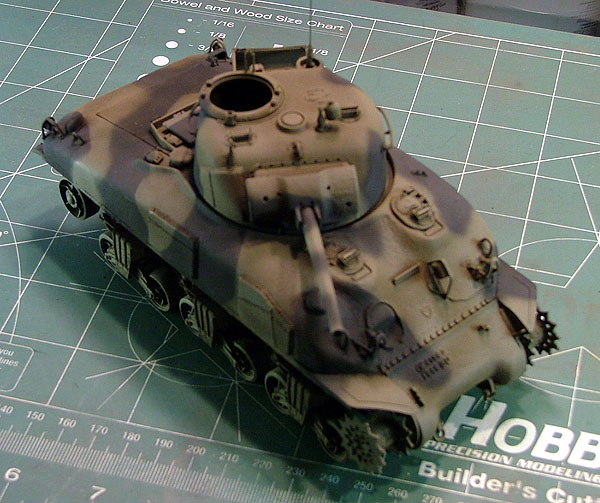
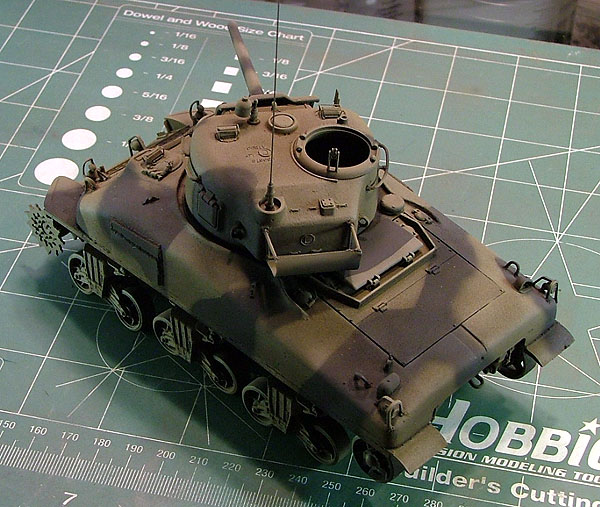
My
base & primer coat is my traditional
Tamiya acrylic XF-1 Flat Black. My Olive
Drab color coats were Polly Scale acrylic
#505224 USAAF Olive Drab. I wanted to create
a "browner" tone in my Olive Drab this time
around. I liked the result in the end.
Lately, I'm finding myself switching brands
to Polly Scale and Vallejo in place of
Tamiya acrylics. Tamiya's paint formula
provides some unpleasant experiences when
applied by paintbrush - where Vallejo
acrylics are wonderful to use. Polly Scale
Acrylics are as easy to airbrush as
Tamiya's, and the color range is more
extensive. I used Tamiya acrylic XF-69 NATO
Black for the second camo color in my
scheme, as it nicely replicates a "scale"
black that is lighter in depth and tone than
my Tamiya XF-1 Flat Black base/primer coat
that provides deep shadow.
I began with painting
the interior of the Hull halves and Turret
with XF-1 Flat Black even though the
interior won't be visible in the end. I then
closed up the Hull halves, puttied and
smoothed the gaps all around, and painted
the underside. I also painted the Bogie
Trucks separately to make sure all the
intricate detail cast in resin would be
covered by paint. When the underside and
Bogie Trucks dried completely I then joined
them together and airbrushed the joints. I
used the Olive Drab color for all the
underside areas of the model.
Next
in painting were the Road Wheels/Arm units.
Left separately, these were far easier to
paint - and I could rotate the Wheels to get
even coverage and paint the Rubber Tires
without having to handle the model and risk
damage. I did not have to attach the Road
Wheels/Arms to the Bogie Trucks until late
in the end assembly.
With
the Hull and Bogie Trucks mated, I then
quickly attached the small fittings to the
Upper Hull - again - left off to alleviate
the risk of damage while I was test fitting,
joining, and putty/sanding the Hull halves.
I slipped the Road Wheels/Arms into place
for a quick alignment check. Satisfied that
nothing was amiss and everything had been
primed, I moved on with the rest of the
texturing.
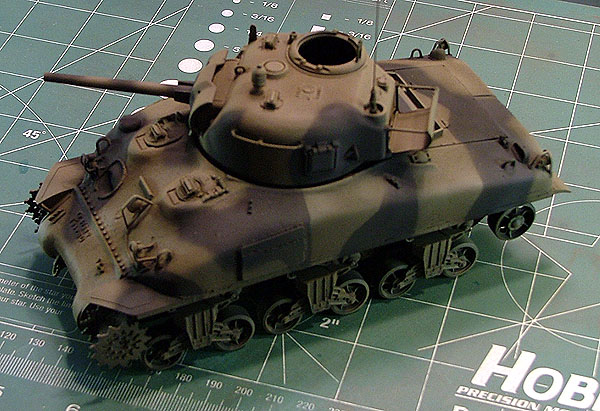
I made
liberal use of Liquitex's Acrylic Texture
Gel Medium to replicate caked mud and dirt
on portions of the hull where earth would be
spattered by the track motion. In the
photographs of "Derby", the tank appears to
be in very good condition at that stage of
the Normandy Invasion. I wanted to model
"Derby" as close to this condition shown in
the photos as I could - which meant not
going overboard on the mud, rust, and
voguish paint wear and chipping so popular
right now in armor modeling.
Applying
the texture gel medium at this stage only
meant I'd have to paint these areas like any
other during the airbrush process. Not
difficult at all. I let the acrylic gel
medium setup overnight before painting over
it.
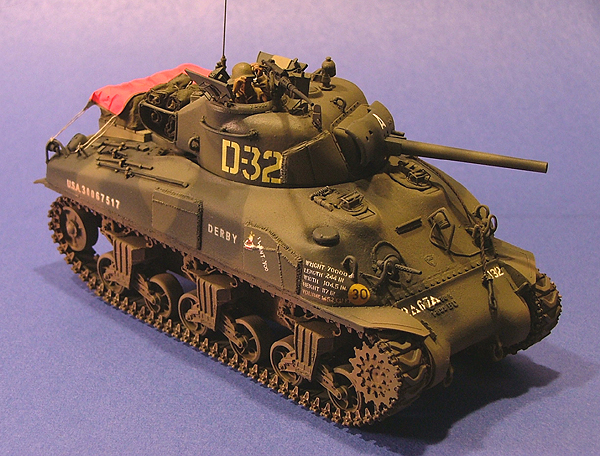
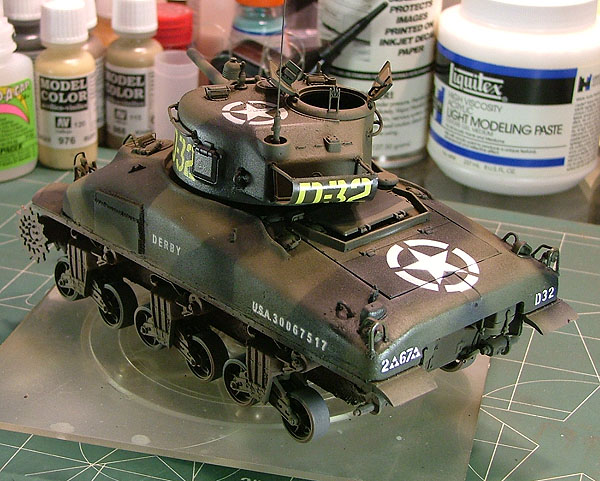
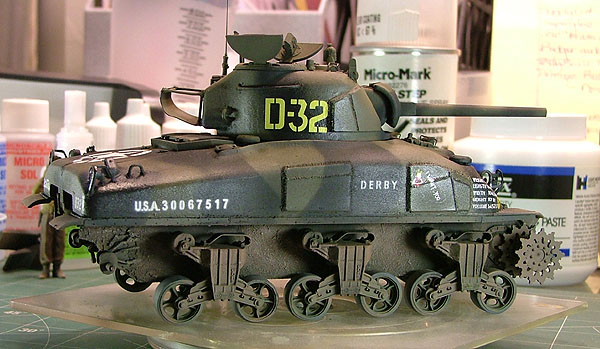
I
applied markings for "Derby" from various
sources. "DERBY" and the tank's registration
number were done with Eduard's 4"
photoetched stencils and airbrushed with
Tamiya acrylic XF-2 Flat White. Using the
photoetched stencils for the first time
proved easy enough - but I recommend you
keep a scrap piece of cardboard on-hand to
practice a little with. I used small slivers
of tape to mask the edges between the
numbers too to prevent overspray. I thought
about trimming the stencils closer but that
proved not to give me enough room to tape
off the edges between them and control
overspray.
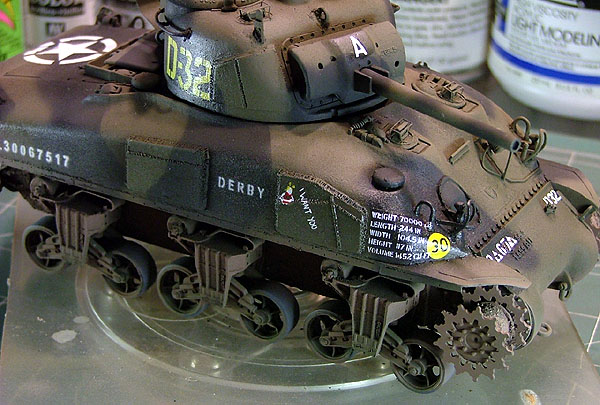
In the
large photo above, I've applied a bridge
plate marking from Microscale Sheet #13-11
US Armor Codes and Insignia. Over this area,
I then transferred M4A1 D-Day Shipping
Stenciling from Archer Fine Transfer Sheet
#35006. The protective overspray is so thin
that the decal proved easy to settle into
place and eventually overcoat with Future to
blend in the film.
Archer
Sheet #35049 2nd and 3rd Armored Division
Large Codes replaced the set of codes lost
from attempting to use the Verlinden
examples. In the large photo the marking
appear to be applied a bit askew - but that
is an illusion created by me not setting the
Turret tightly into the Turret Race on the
upper hull.
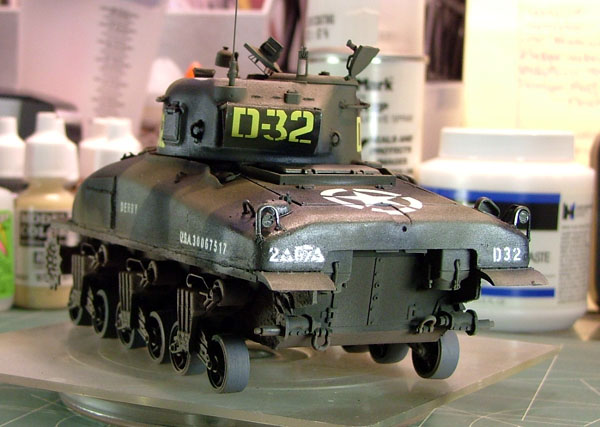
Fellow
modeler, Formations Models fan, and
Armorama.com brother Rick Craig sent me the
old Verlinden dry-transfer set for "Derby"
that's been out of production for some time.
As with old Verlinden dry-transfers, these
markings sadly disintegrated when I
attempted to affix them to clear decal sheet
for applying "wet-style". All except the
little doll in her highchair and the
mysterious "I WANT YOU". This was a stroke
of luck! I was able to transfer it to clear
decal film, overspray it (which becomes your
carrier), and finally apply it like a
water-slide decal.
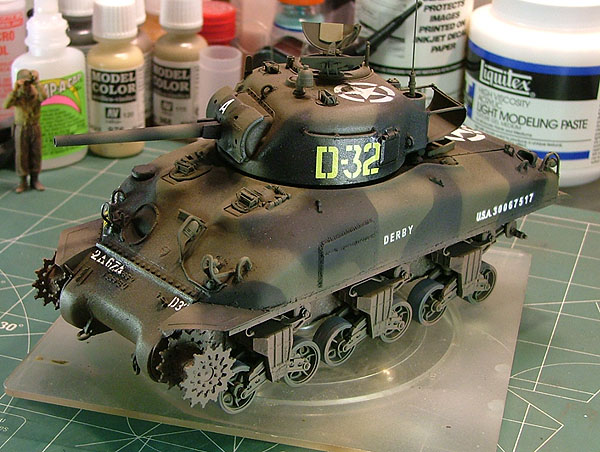
I
overcoated portions of the model with Future
Floor Finish acrylic gloss to eliminate
decal silvering prior to applying the
markings.
In the
above photo, I used dry-transfers from the
old Pre-Size 4" Depot Markings set - again
applied "wet-style". I used Micro Set and
Micro Sol carefully to get these decals to
settle down over the raised casting markings
cast into the Formations Model parts. Since
I knew "Derby" had been repainted prior to
the Normandy Invasion, but couldn't see the
codes clearly in the photos I had, I opted
to match the size with the airbrushed
vehicle nickname and registration numbers.
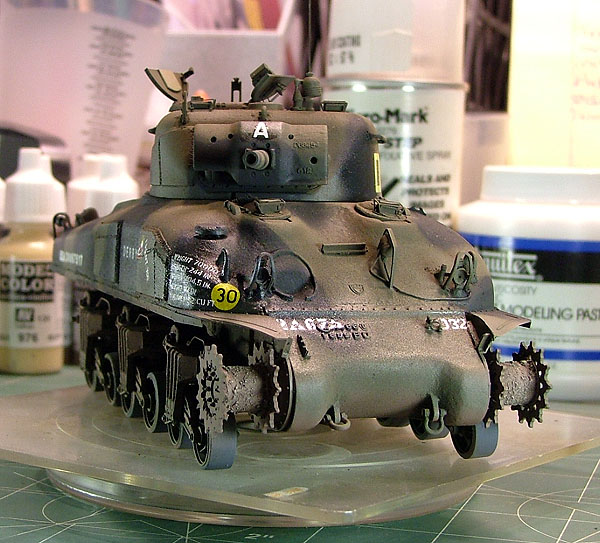
Lastly,
the "A" marking on the top of the Mantlet
comes from Verlinden #252 USAF Lettering. It
is visible in the head-on photo of "Derby" -
hand-painted. I settled on "A" although it
could easily be "R" too. This appears to be
a marshaling marking when the vehicles were
staged in England prior to the Invasion. I
referenced a photo in Time-Life books
coverage of the D-Day Invasion.
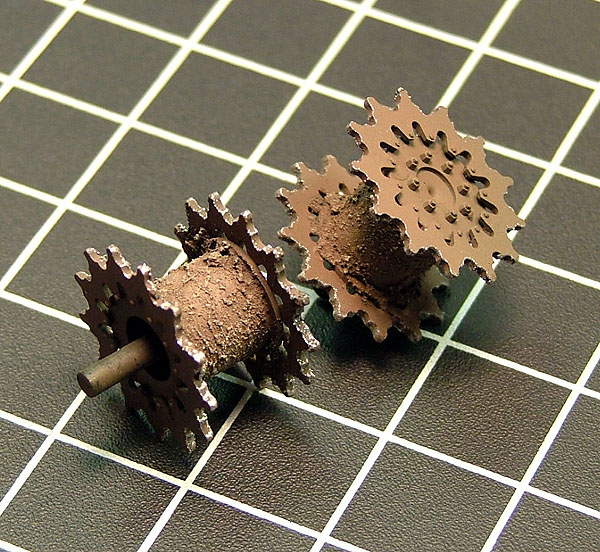
Though
not decaled, weathering parts of the model
came in different steps. Here, I muddied up
the texture gel inside the Drive Sprockets
prior to mounting them on the model. Not
easily seen in the completed model, unless
the viewer gets down in there to see, this
is an easy and fun detail to add to your
miniature tank models. It adds welcome depth
to your model and helps to convey a subtle
sense of presence amongst a sea of Olive
Drab painted models on a display table.
|