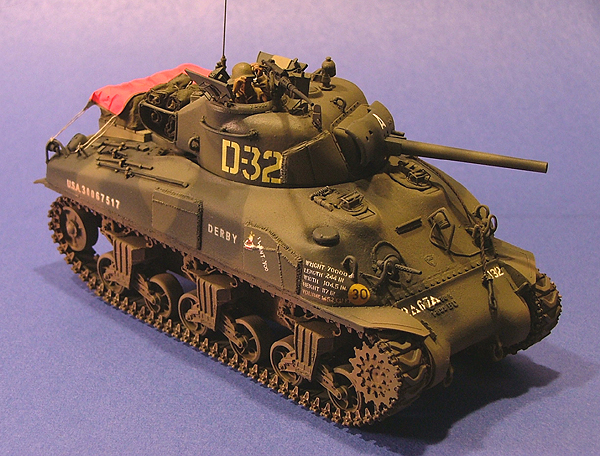
|


|
Not
needing to be overly concerned with
neatness, I applied the Apoxie Sculpt
generously to the seams underneath the
sponsons. I had plenty of time to work with
it, so speed wasn't a great concern either.
I let the Apoxie putty setup for a few
minutes and then smoothed out the excess
with a wet finger.
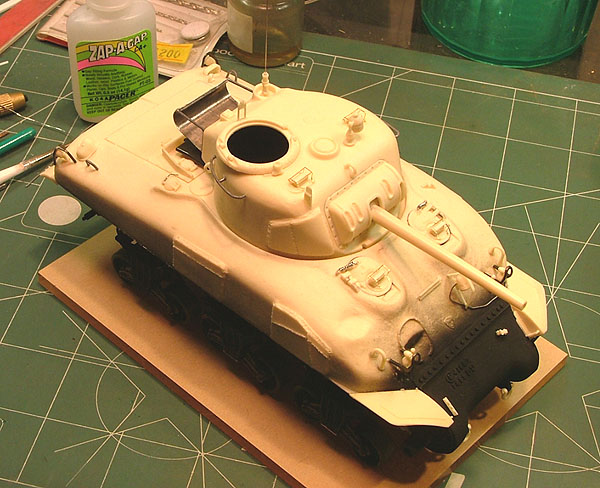
I left
the model alone for about an hour and then
smoothed out the area some more with a
medium grade sanding stick to the finish in
the photo at right.
I
don't mean to rave about either the
Formations Model product or Apoxie Sculpt
too much - but - I enjoyed working with both
on this project quite a bit. I experienced
no problem to complain about, and that's
pretty remarkable for the first time using a
new product.
After
working and sanding the Apoxie Sculpt so
fast, I left it alone to dry overnight -
hoping that I didn't mess up by being too
eager to work with it. To my relief, I
discovered it setup fine the next day. I can
honestly recommend Apoxie Sculpt to novice
modelers used to working with 2-part putty
systems.
Formations Models
Horizontal Return Roller Bracket
Suspension
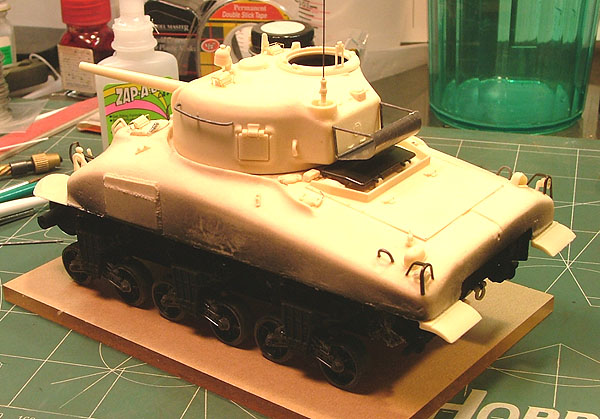
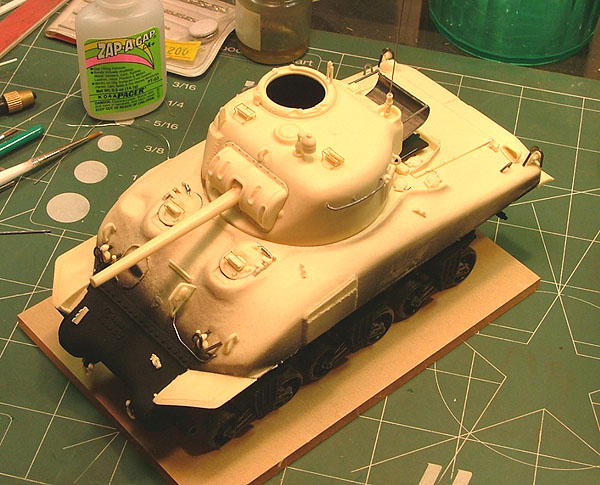
Quite
pleased with how quickly and cleanly
this conversion project was going, I
moved into putting together the
all-important bogie truck subassemblies.
I still hadn't permanently joined the
two hull halves so that I could continue
handling the model during construction.
In retrospect, they fit together so
snugly (no tape needed to keep them
together once the Transmission Cover was
glued into place) that I didn't need to
be so cautious.
Formations
Models provides the bogie trucks in single
pieces - welcomed by me - with very nice
detail present. These were the only pieces
in my conversion set where I can say I
spent a fair amount of time in cleanup.
Formations' casting is complex and the
cleanup of flash is minor. Dimples are
present representing the mounting points
for the return rollers on the opposite of
the bogie truck - I enhanced these bolt
holes a little more with a few twists of
my pin vise. In cleaning up the return
rollers, it is easy to sand them out of
round profile. Proceed slowly. The return
rollers in my conversion set were out of
round, and I did spend time to get them
back into shape.
It might have been
more expedient to cut them away and use
Italeri rollers instead. I really
appreciated the two piece suspension
parts provided by Formations - but - I
wouldn't have minded getting the return
rollers separately. Three pieces to put
together wouldn't have been bad at all!
Deviating
from the suggested Formations instructions
meant that I did not trap my Road
Wheels/Arms inside the bogie trucks. This
allowed me to paint them separately and
then attach later. To allow the Road
Wheels/Arms to rock like in the original
Italeri kit, I inserted a length of
Evergreen styrene rod (#232 .080" Rod) to
replace the pins in the Italeri parts. The
new rod sits in the cup underneath the
Italeri Volute Spring (Italeri Part #B3)
and is easy to drop into place during the
end assembly before mounting the track
runs. Formations Models resin Track Skids
are thin and pleasing to the eye - and
they provide a couple extras in case you
slip-up during removal from the pour
gates. Slipping them into place neatly
wrapped up modeling the suspension. Of
course, the Italeri "rocking" motion isn't
strictly accurate, the arms on the real
examples move independently, dampened by
one of the vertical volute springs. You
could go all the way here and use AFV
Club's suspension arms to post your tank
treads in action. I was thrilled with my
kit and didn't feel the urge to go that
far.
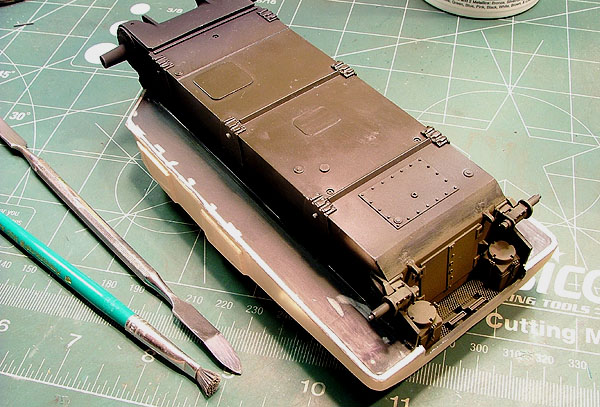
Before
closing up the Hull, I painted the insides
of the rear hull underside as well as the
tops of the Air Cleaners and Engine Deck
Screen to make sure I got adequate paint
coverage on the dissimilar parts. I made
the Engine Deck Screen by first cutting a
pattern out of 3M Post-it Notes paper and
then used that to trim out brass micromesh
sold by Scale Scenics (#652-3501).
Formations M4A1 Hull with Applique Armor
- Hull Fittings & Little Bits
Take
your time - again - in separating the
thin Fenders from the resin pour gates
and carefully remove the resin flash. I
test fit mine several times to the Hull
to make sure what I was removing in
cleanup was indeed what I was supposed
to be removing.
Formations
Models' conversion kit provides you a nice
length of wire to model the Latch Pins for
the Armored Fuel Caps (Parts #B1). I opted
to use .015" solder instead because I had
a #80 pin vise drill bit handy. Removing
the Armored Fuel Caps from the resin pour
gate wasn't as tricky as I thought it
might prove - but Formations provides
extras in case you mess up along the way.
You only need five for this conversion.
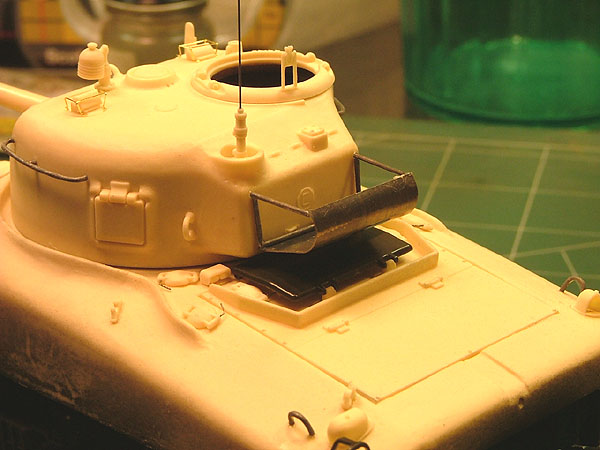
High
on the "cool factor" chart, Formations
also provides you an option to attach
the infamous "Comb Device" (Part #G8) to
your model's Transmission Cover. You
know I couldn't resist! I highly
recommend cleaning up the delicate "Comb
Device" while still attached to the
resin pour gate - and to trim it away
carefully afterwards. I launched mine
high into the stratosphere and
fortunately rescued the piece in the
nick of time before it was lost to the
Carpet Monster forever.
I
cleaned up all the Lift Rings and Tow
Clevises while still on the resin pour
gates successfully before trimming them
away. I drilled out the end of the
.30cal bow Machine Gun Barrel with a #80
bit and then with the point of my X-Acto
Blade. I opened up the Machine Gun's
mount (Formations Part #E6) and
Italeri's Armored Cap with a 1/16" drill
bit to accept the Formations .30cal
Machine Gun Barrel cleanly. Keeping the
1/16" drill bit out, I also cleaned out
the resin flash on the delicate Tow
Cable Clamps (Parts #K4) and inserted
the Tow Cable Eyes (Parts #F4) to make
sure they slid in and out easily.
I
cleaned up a little resin flash from the
Headlights (Parts #F5) with a couple of
twists with a 1/8" drill bit. Formations
Models conversion kit includes two MV
Products Lenses for inserting into the
Headlights in the end assembly. Very nice
touch! With the Tail Lights (Parts #K2)
Formations instructs you to remove the
bottom mounting portion cast into these
parts.
Unfortunately, I trimmed
too much away and didn't feel comfortable
with the result. I super-glued short
lengths of scrap styrene .040" rod to the
Tail Light post and drilled corresponding
holes where they'd eventually locate on
the Upper Hull. These were easy to insert
in the end assembly and set to an
acceptable height. The Siren/Horn (Part
#G2) is cast on the round end of the back.
Trimming it away from the resin pour gate
created an undesirable flat spot. I filled
this spot with a good sized drop of super
glue, dropped a spot of accelerator on the
super glue, and then carefully spun the
Siren/Horn between my fingers against a
sanding stick to restore the blunt,
rounded profile. I sat back and called it
a day.
|