|
Formations
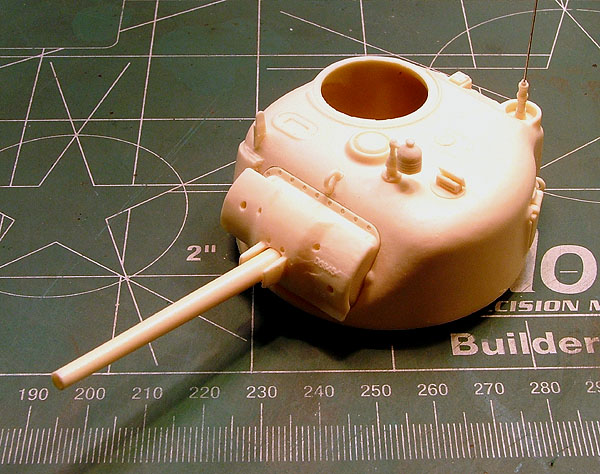
M4 Low Bustle Turret Sub-assembly
I began
my modeling efforts with the Turret. Before I
continue, I must caution you that there are a
fair number of parts in this conversion set.
The resin pour gates are marked with part
number callouts - and it is advisable you have
room to spread some out as you go to make sure
you've got all the parts in the right place
for the step you're working on at that time. I
found it helpful to actually cleanup my
workbench and remove other in-progress models
to make room for this one. I also did not wash
any of the Formations Models resin parts prior
to assembly, nor afterwards. I found them to
be quite clean and free from resin mold
release.
There is
a small pour plug to remove from the hollow
turret shell and the opening for the Mantlet
is easy to cut away with a sharp X-Acto blade.
Working with resin, it is advisable to keep a
supply of new blades handy - they make the
cleanup work easier. To remove the resin pour
plug located underneath the front lip of the
turret casting, I recommend flush sawing with
your 1" saw blade. Several times I caught
myself wanting to snip this away with a pair
of Xuron Cutters, but I was afraid I'd damage
or split the thin casting here. Flush sawing
was definitely the way to proceed here.
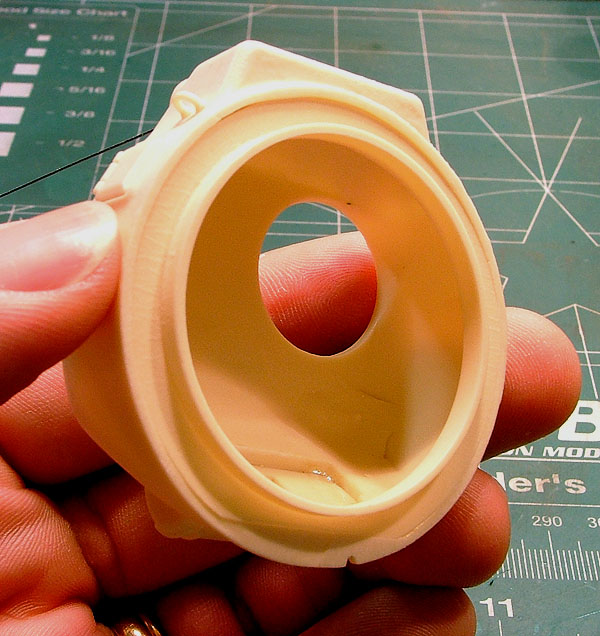
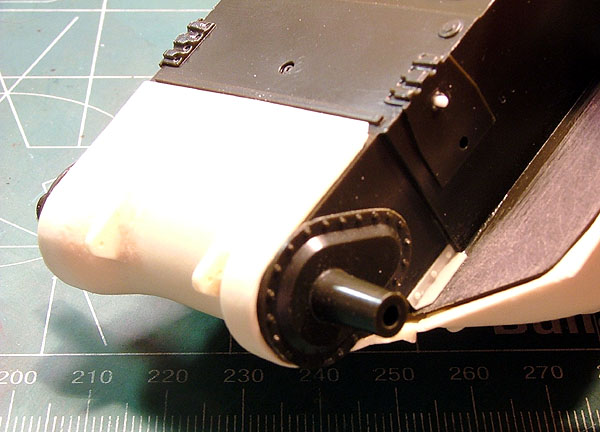
To
deal with the turret race (photo left), I
attached sandpaper to a sheet of glass and
sanded the part down for a good fit. The
turret race in my kit was a little larger than
the circumference of the turret opening.
Flipping the part upside down to sand helped
reduce the diameter of the part. I then
matched the flat end of the turret race to the
corresponding area of the turret bottom
underneath the Mantlet - trimming the areas
around the ring slowly with a sanding stick
until the two parts fit flush. Patience (a
part of the Formations suggested assembly
instructions) pays off dividends in working
with any miniature. I can't emphasize how
important it is to sand slowly and test-fit
frequently when building resin kits. It is
eminently easier to remove small bits of resin
at a time than to try and go back to fill
areas where you too aggressively removed
material.
All the
Mantlet/Gun Mount parts fit snugly to the
Turret opening. Follow Formations' suggestion
to leave the flash inside the Lift Rings while
you attach them to the Turret. It is easier to
attach them and then clean up after the glue
sets - lessening the chance of breaking the
delicate parts. I chose to model my Loader's
Periscope in the "up" position (actually - all
of them), so I set Parts #H1 and K1 into place
per the instructions. I decided to not use
Part #F3 (Antenna Mount) as provided in the
conversion set and instead used one of
Formations' US WW II Vehicle Antenna Mounts
and Masts (#F010). I just love these, they
come with the antenna wire cast into the
Mounts - and they are removable for painting
separately. Part #G5 (MG Travel Lock) was
a bit tricky to cleanup, but patience and a
sharp knife helped make this a break-free
step. I found myself referring back to my
completed Tamiya M4 (Re-manufactured) to aid
in placement. The Formations Models
instructions are good, but as I'm not overly
familiar with the Sherman - every additional
bit helps.
Careful
trimming got me the Commander Hatches clean
and ready for addition of small details found
in nicely cast Periscope and Latch parts. I
also fitted the Searchlight provided in the
conversion set. All in all, messing around and
watching TV, it took me an hour to clean up
and assemble the basic turret sub-assembly.
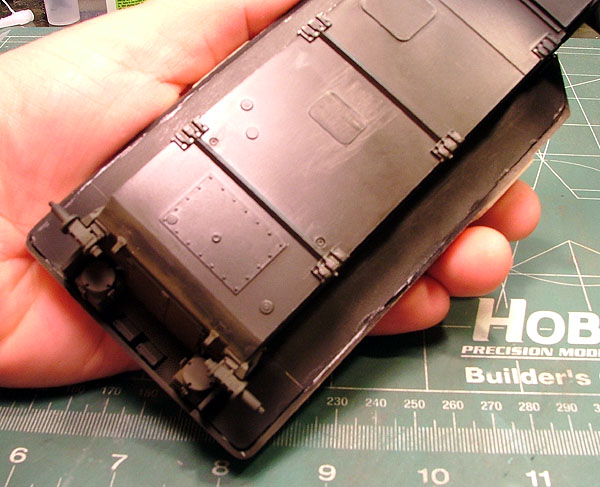
Formations
Models M4A1 Hull with Applique Armor
Moving
on to the Hull, I began by cleaning up all
the odd bumps, sinkholes, and associated
remnants of the Italeri manufacturing
process. Each kit will vary in cleanup
called for, but remember that this is an
oldie - but a goodie. I fitted the Braces
(Parts #L3 and L4) into place underneath the
leading edges of the sponsons as called out
in Formations' instruction sheet. I worked
on the Tom Cable and set it aside as well.
In
cleaning up the resin Upper Hull, I scored
around the Engine and Turret opening with
the sharp X-Acto Blade a few times - then
punched through the center of the thinner
resin flash with the blunt end of my X-Acto
Knife. I braced the Upper Hull piece on my
workbench before doing this. It worked like
a charm - though sounding unorthodox. The
remaining cleanup for the Upper Hull was
easy and quick. I also sanded the bottom of
the Upper Hull with sandpaper attached to a
glass board for good measure - though my
casting was clean and air bubble free.
In
test fitting to the Italeri Lower Hull pan,
I opened up the flashed-over notches in the
nose of the Formations Upper Hull piece for
a better fit. Skipping ahead in the assembly
sequence, I attached the Sponson Plates
(Italeri Parts #A17 & A18) to the Lower
Hull Pan. I wanted to test-fit the joining
of the two Hull halves quickly. You will
have to trim back the Italeri plates a
little to fit the Formations Upper Hull
properly. Just work slowly and trim back a
little at a time until you set the two
pieces together properly. I used a Miter
Cutting (Chopper) tool to trim back the
Italeri parts until they fit. I glued them
into place with Model Master Liquid Cement
and then joined the two Hull halves so that
the parts could setup in place overnight.
The next day I would address the joint with
Gunze Sangyo Mr. Dissolved Putty and
subsequently sand the joint clean. Letting
the Hull halves setup overnight is a good
opportunity to cleanup the rest of the small
Hull fittings. In resin, this proved
considerably less of a time-intensive chore
than it would have been for the
corresponding plastic Italeri parts.
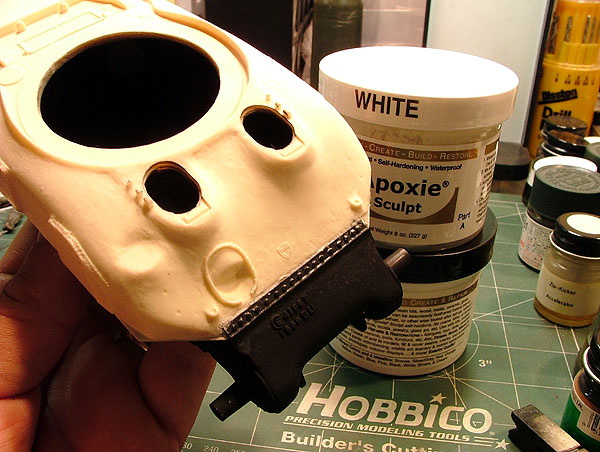
The
next day, I proceed to trim away the flash
at the rear of the Formations Upper Hull
covering the characteristic "notch" present
on the actual Hull casting. I went to fit
the solid resin Transmission Cover and
Engine Deck pieces quickly afterwards. The
Formations Models instruction booklet
doesn't cover fitting these parts, but I
found this task virtually a no-brainer -
they just slide into place. Test fitting
revealed that indeed a small amount of putty
is called for at the joint between the Upper
Hull and Transmission Cover - as mentioned
in the Formations instruction sheet. For
this, I found the Apoxie Sculpt ideal to
work with.
I then
proceeded to fit the Formations parts found
underneath the Real Hull overhang. I held off
on permanently joining the Upper and Lower
Hull halves until I got these pieces into
place properly, taping them together instead.
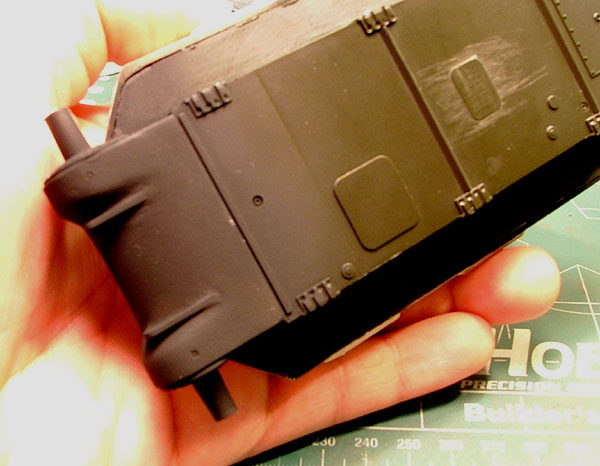
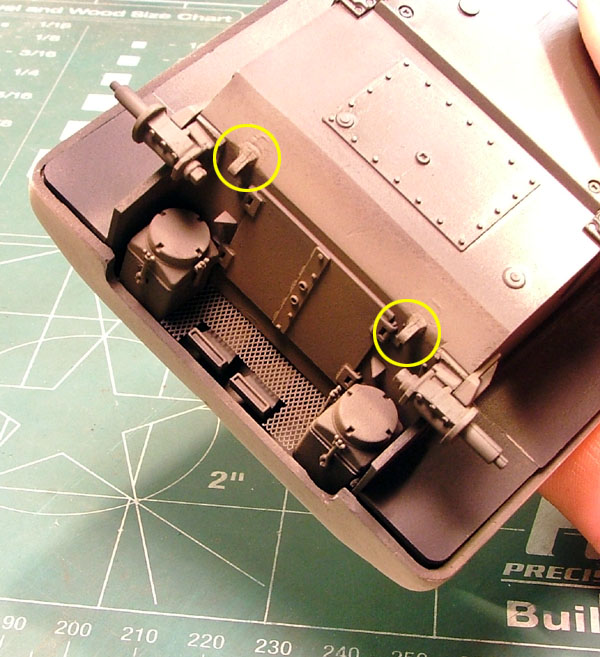
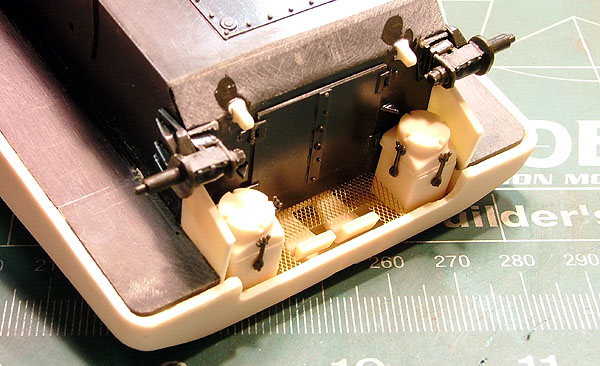
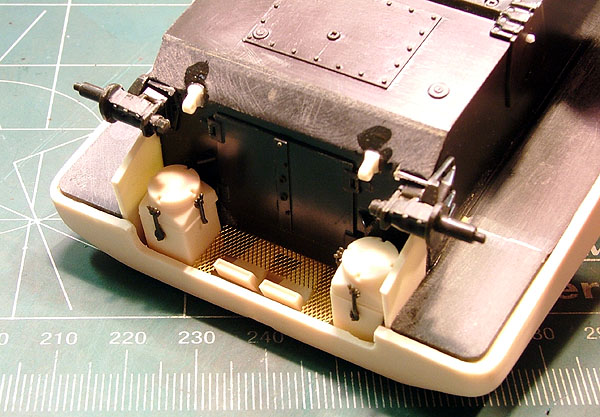
Formations
indicates that you may find that you have to
trim down the tops of the Air Cleaners (Parts
#D4 & D5) to get the Upper Hull and Lower
Hull to fit correctly. I adjusted the height
of fitting the Exhausts (Parts #D6) to the
Italeri Rear Hull Panel because I felt they
sat too low - sticking out too far below the
Formations Upper Hull Notch - during test
fitting. Then, I set the two "wings" (Parts
#J3 & J4) into place, mounting to the left
and right sides of the Rear Hull, and used
them to line up the Air Cleaners (Parts #D1,
D4, & D5). The fit is so tight that there
was no need to glue the "wings" into place as
I eyeballed the Air Cleaners into their
spaces.
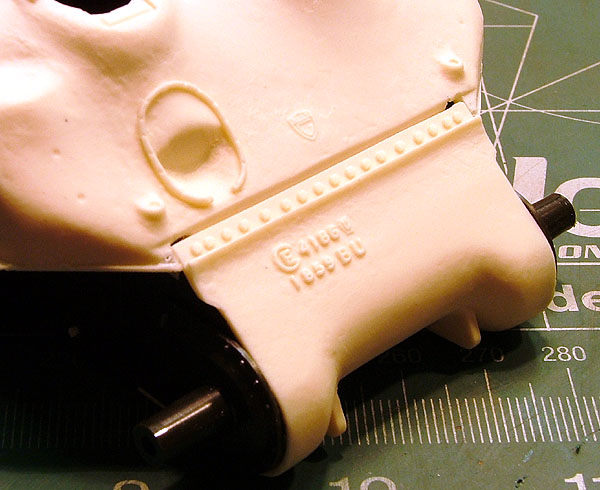
I
did trim away the innermost nubs on the
Italeri Rear Hull panel to better accept the
Formations resin Air Cleaners - their mount
stubs are slightly wider than the
corresponding gaps on the Italeri part.
Formations instruction sheet shows the "wings"
as notched at the bottom to clear the mount
for the Idler Wheel - but my parts were not.
Simple to perform, I just cut quick notches
with my X-Acto Knife and moved on. Lastly, in
this area, I fashioned the Screen that the
Exhausts pass through underneath the Rear Hull
overhang using scrap photoetch parts.
With
all the major sub-assemblies completed, I
proceeded join the Hull halves. They fit so
well together that I felt comfortable using
5-minute epoxy for the bond. This provides
both strength and some setting time to get the
two halves together and adjust if necessary.
Don't you hate it when you've test fitted two
parts together several times, only to then "go
to the super glue" and not get that perfect
alignment? Murphy's Law in action. The
5-minute epoxy gives you some time to make
sure things line up. Before proceeding, I
allowed the model to setup overnight.
Joining
the Hull halves was uneventful the following
day. The 5-minute epoxy went on first for
strength and some gap filling around the
sponson joints - leaving little to fill in
the end. This proved to be a plus. Next, I
applied the Apoxie Sculpt as a filler to
eliminate the left over seams between the
Italeri and formations Models Hull halves. I
found the Apoxie Sculpt the best 2-part
putty I've work with in modeling to date. It
is simple to work with, soft and won't cramp
your fingers like Milliput can while mixing
and working. Wearing gloves is optional -
and I tested that with this model. I worked
it with no skin irritation and kept a little
water on hand to prevent it from sticking to
my palms and fingers. I only used a pinch of
each tin and rolled them together. Apoxie
Sculpt gives you from 1 to 3 hours working
time - but I puttied the joint between the
Transmission Cover and the Upper Hull as
well as both sides underneath the sponsons
in about 15 minutes.
|
I noticed a slight bend in my
75mm Gun Barrel, but it wound up being not
that noticeable in the end assembly. I trimmed
it away from its pour gate and cleaned up the
end with a few swipes of the sanding stick.
Then, I heated the part in hot water (not
boiling) and rolled it on a glass sheet to
take out the slight bend. It fit into its
rotor (Part #N2) without any problems, and
there is a little slack to allow you to adjust
the barrel's fit.

|