|
Steps
Six & Seven: For some of the fixtures on
the upper Hull, Dragon Models provides
options in plastic and photoetch. Pretty
difficult to suit various modeler's tastes,
Dragon Models deserves commendation for
attempting to do so. Selecting either medium
will give good results, so neither is better
than the other. The plastic parts cab be a
bit thick for the scale, and the photoetch
conversely too thin, for effect - but it is
there for the modeler to choose. Though no
interior or engine compartment is included,
Dragon Models gives the modeler separate
engine panels if they want to take their kit
to another level.
Dragon
Models gives you Armored Fuel Caps that can
be positioned opened - but the Fuel Fillers
themselves are molded closed, interestingly.
Naturally, nothing stops the enterprising
scale modeler. In modeling the M4A1(76)W,
pay careful attention to the engine deck
arrangement. The tank I am modeling does not
have the two Fuel Fillers on either side of
the Engine Air Intake as molded in the
Dragon Models kit. However, this detail is
easy to trim away and fill smooth. The Fire
Extinguisher Handle Housing is blank on the
underside, and can be blanked off at this
point. You could take the time to fashion
your own Handle details to go inside this
tiny space before doing so.
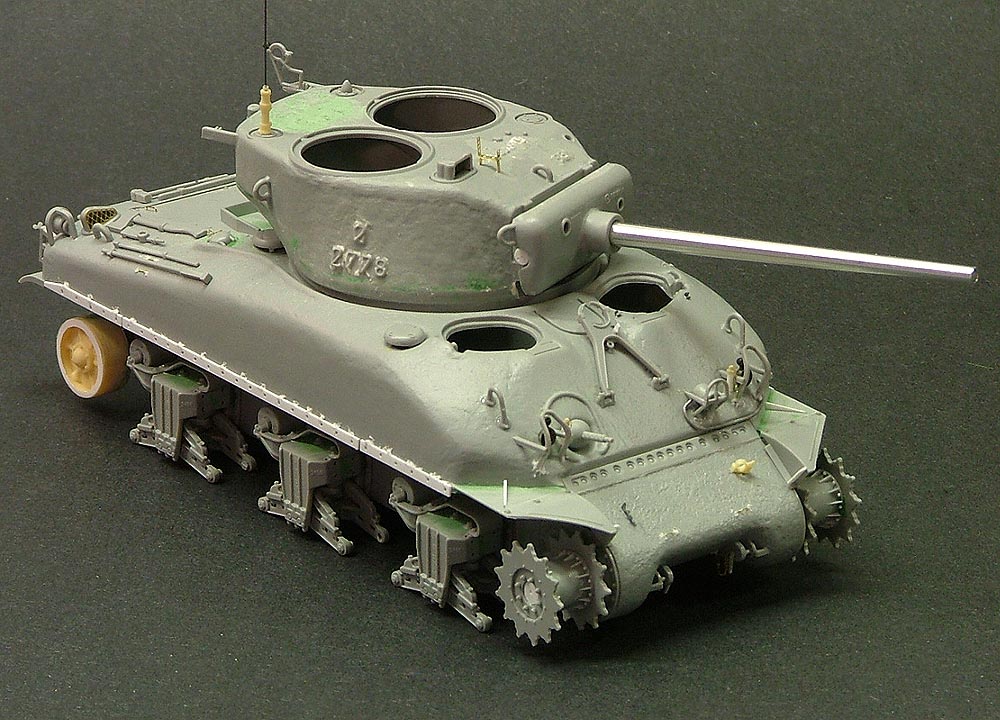
Though
generally happy with the kit overall, I was
less enthused about the quality of the fit
between upper and lower hulls. The turret
halves went together a bit better - but
would still call for putty work and
contemplation on just how to do it without
radically altering Dragon Models' casting
texture present. Counting on its
characteristic shrinkage, I turned to
Squadron Green Putty, and it worked in this
instance.
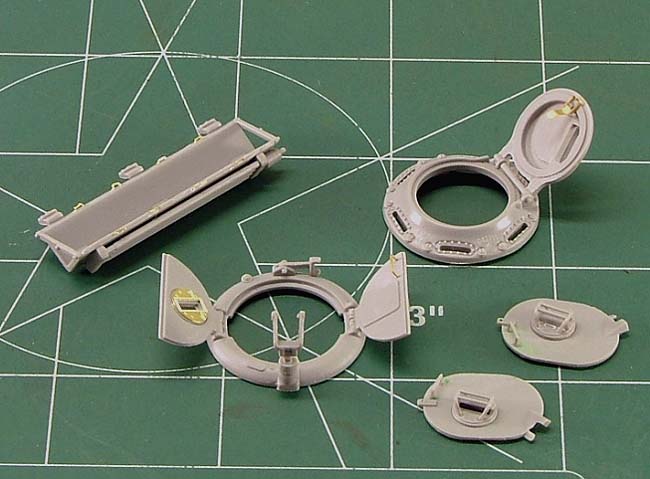
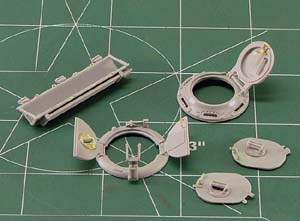
Dragon
Models' Driver and Co-Driver Hatches are not
detailed on the insides, calling for some
extra effort if you want to display them
open. My project didn't call for that, so I
left them alone. Otherwise, I left the
details they provided intact except for
little things like drilling out the Hatch
Lock bar. I also preferred their plastic
Periscope Guards as opposed to the photoetch
replacements - as these don't capture the
look and heft of the real items. Careful
thinning and cleanup is the only thing
called for in using the plastic parts.
Simply
overwhelmed (in a good way) by all the sprue
trees included in this kit, I could not find
the Travel Lock Latch (Part A59) while
building the kit. I fashioned my own out of
scrap styrene. Murphy's Law came into play
later, and I spotted the little bugger on a
sprue tree after I was done, and about to
throw away because I thought it was empty.
I
fashioned a cable for the Horn with a simple
length of solder, made Headlight Plugs out
of styrene scrap, two Verlinden resin bolts
and small lengths of Aber photoetch chain.
Dragon Models included an interesting set of
clear Headlights, and though intrigued by
them, I opted for a pre-drilled set of
Italeri parts that I could insert MV
Products (#L116) Lenses. I wanted to
experiment and save the Dragon Models
goodies for a future project or two...
I
attached the rear Fenders (Parts H16 &
H17) to my model, though not called out on
the Instruction Sheet, after cleaning up all
the putty work on the joint between upper
and lower hulls. Then, I went on to adding
the smaller fixtures to the Hull.
The
suggested front Fenders (Parts H14 &
H15) do not look like the right equipment
for the Sherman I wanted to model, but I
decided to attach them to the Hull and then
modify them in place. It was actually easier
than it sounds. Dragon Models Parts #A01 and
#A02 are extras in the kit, and comparable
to the parts in the Italeri model kit - and
usable if you are not inclined to rework the
other Fender set.
In
Step Seven, you have the option for using
Part #H3 or #K1 to mate with the Engine Air
Intake Panel (Part H2). I went with Part #K1
because it has the accurate Oil Filler Cap
detail, and replaced the molded-in Handles
with .010-inch brass wire. I also removed
the molded-in Armored Fuel Filler Caps on
this part, to either side of the Air Intake,
repaired the resulting holes with putty and
scrap plastic, and restored the bolt details
obliterated in the surgery process. I tossed
in some bolt heads for this hinges of Part
#H4 (Armored Intake Cover) while I was at
it.
I
found it curious that though Dragon Models
provided separate Armored Fuel Caps for the
kit, there were not corresponding pins and
chains included - common items for Sherman
modelers to add to their projects. There are
parts to add to the Cal.50 Machine Gun and
Mount, however. It is a nicely detailed
subassembly.
The
Spare Track Link Racks (Parts K2 and K3)
benefit from the addition of a Wing Nut to
the upper edges, I used Grandt Line parts
for this detail. Initially, I wanted to use
Aber photoetch parts, but they proved
frustratingly challenging to set into place
properly. Give me good old plastic any
day...
Steps
Eight, Nine, Ten and Wrapping it all up: I
didn't totally put the Aber Sherman detail
set away - it provided tie-downs for the
Storage Rack and Pioneer Tools. I would
rather have had more photoetch parts like
these provided in the Dragon Models kit
rather than the 76mm brass rounds. I went
ahead and drilled a hole in the upper rear
of the Hull for the Engine Starter Crank Rod
(Part A39) too, though this will be all but
hidden in the end by the Storage Rack. I did
this because I might decide at the last
minute to not use a detail or feature, and
didn't want to neglect putting it there.
Same goes for the discipline in cleaning up
ejector pin marks and sinkholes on parts -
even when you think they won't be seen. No
one wants a surprise in the end, in a place
you can't reach...
I
welcomed Dragon Models' inclusion of an
aluminum Gun Barrel in this kit release. No
further mention of the comparable Italeri
kit part needs to be said. Dragon Models
also gives the modeler a plastic Gun Barrel
too, though I felt once cleaned up and
fitted it fell a little short of the posted
length in the Technical Manual covering the
M4A1(76). The Mantlet is also an improved
part in this kit release, correcting prior
issues by relocating the Lift Rings to the
upper corners and centering the cutout for
the Trunnion. I added two punched disc
details to dress up the otherwise plainly
presented Trunnions in the model kit.
I also
noted appreciatively that Dragon Models'
Mantlet has a wider opening for the Gun
Barrel to pass through, so that it does not
fit flush, accurately. There should be a
small gap between the collar and the Gun
Barrel. In my kit, the plastic barrel fit
into position tighter than the aluminum
part, just calling for a little more
attention to align it when gluing.
Since
I am fawning over the Dragon Models kit
right now, I also should mention I liked the
Commander's Cupola and Loader's Ring
subassemblies - especially the glass inserts
for the Cupola. Even though I didn't use the
clear plastic "glass" parts as provided in
the Dragon kit, I liked the touch.
I
didn't mess around with the Cal.50 Machine
Gun subassembly much. I added the missing
Cocking Handle, made from a little length of
styrene rod and drilled out the front sight.
If I could have asked Dragon Models to do
anything differently would have been to cast
the Cradle separate from the Cal.50 Machine
Gun body - to increase the detail and make
painting easier.
Lastly
- and I had to end it somewhere, as you can
go on and on and on finding 'something' to
add to a Sherman tank model - I set aside
the 76mm brass rounds. I know I must have
mentioned them a couple of times before now,
but I seriously would have traded their
weight in more photoetch chain, pins, and
assorted goodies to dress up the basic
details found on Sherman Tanks. The only way
I'd figure I use my brass rounds would be if
Dragon Models comes out with a Gen2 US Tank
Crew.
I'll
be holding on to my 76mm brass rounds in
eager anticipation of that day...
In
Step Eleven, the model miniature takes
shape, and begins to get interesting to me.
The construction and detailing process is
fun, up to a certain point, but can get
tedious. When you can put the subassemblies
together to look at the whole shaping up,
like I do, I get reenergized.
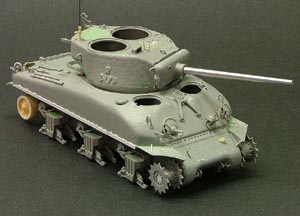
At
this point, the Dragon Models kit looks
seriously good. It sounds like I put a lot
into it, but looking back it seems all worth
it. It strikes a great profile, gorgeous
from all angles. Almost as an afterthought,
I went in to add the Sand Shield Strips
because the other tanks in the unit had
them. Not all the 76's did, however. I
didn't add them without photos of the other
tanks in the unit and some deliberation.
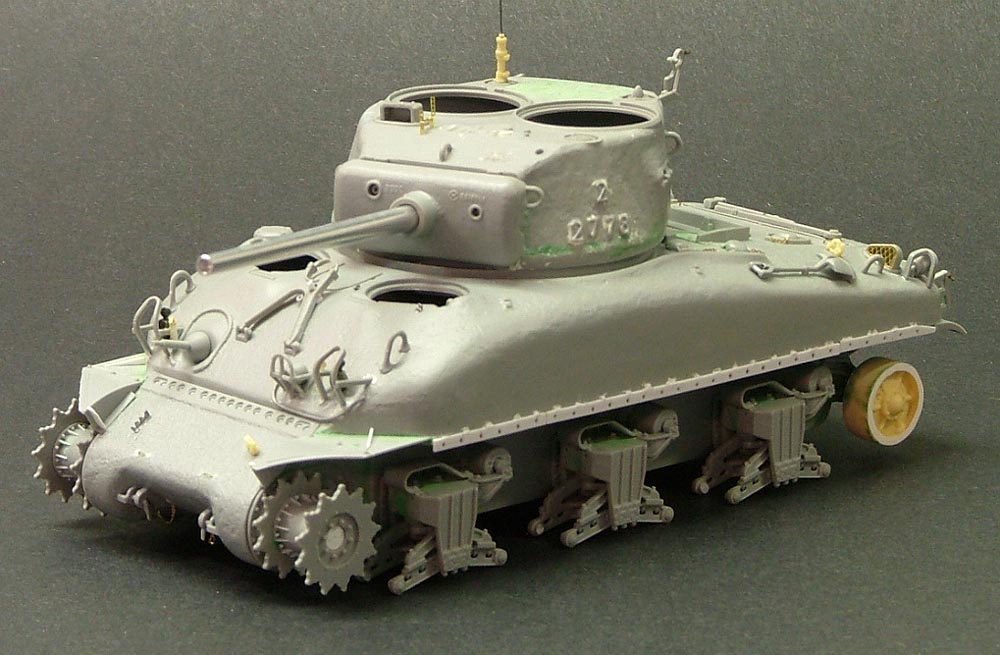
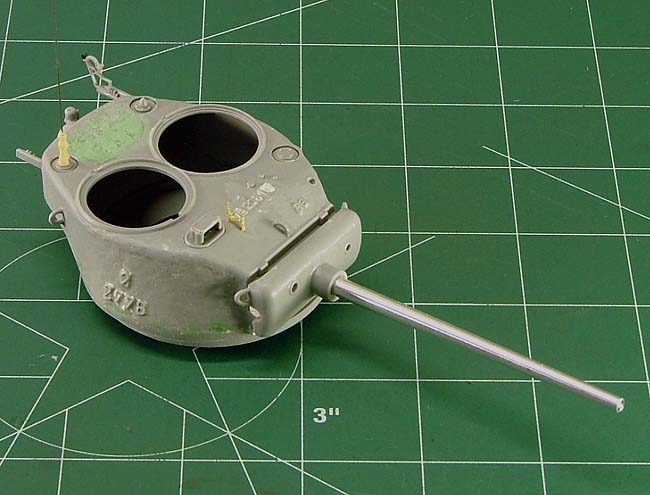
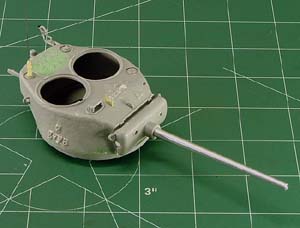
The
Turret is a nice subassembly overall, with
properly fared in Shell Port and nice sand
casting texture. I still haven't seen any
model kit texture that looks like the actual
sand castings on the real Sherman tanks, but
Dragon Models' effort is much better than a
smooth surface.
|
Virtually all of the
fixtures you'd expect to see on a Sherman
turret are present in the Dragon Models kit,
nicely executed too. I rough sanded the
lower face of the Turret as it appears more
pronounced and sharper-angled than presented
in the Dragon Models kit in real life. I
endeavored not to go overboard in this
exercise, however.
I liked Dragon Models'
photoetch attention to the Tow Cable
Clamps, but I opted not to use them. I
prefer Formations Models parts for this
detail, with a Grandt Line Wing Nut (#162)
going on the Cal.50 Stowage Clamp on the
Turret for good measure.
Did I mention that in the
end of the construction phase, I tend to
bounce around from subassembly to
subassembly? Well, I do - it's fun...


No
Antenna Mount is provided in the Dragon
Models kit - least not in my examples - so I
resorted to Formations Models parts again. I
wanted to model three, 3-foot, antenna
sections for my radio fit, and the
Formations Models part fit the bill. I
mimicked the connectors between antenna
sections with white glue, and contemplated
painting them red, yellow and green - but
decided against it as it my be considered
over-the-top.
In
retrospect, I should have done so anyway.
The
Commander's Vane Sight comes from the Aber
photoetch set for Sherman Tanks. I made two
clamps for the Driver's Foul Weather Hood to
mount on the Hull out of lead foil - that is
virtually unnoticed in the end - unless you
go looking for them. I deleted Dragon Models
Part H8 and H3 (Lift Ring) from my Turret. I
put the Hull aside to concentrate on the
individual track runs.
This
was my first time working with the tracks
provided in a Dragon Models kit. I have
heard horror stories, and success stories.
All say they take a good deal of time and
patience. In retrospect, I would heartily
agree.
The
track links were cast nicely, with some
subtle wear simulated on the faces of the
rubber chevrons. The Dragon Models kit
provides two complete sets of tracks, though
only one is usable for my purposes. There
are two sets of extended end connectors too.
Unlike
early examples of RHPS individual track
links that suffered from sinkholes on every
link, the Dragon Models parts in my kit only
sported a single, shallow, ejector pin mark
on each end connector to remove. I wish I
could brag and tell you this was a simple,
quick and easy task to accomplish - but it
wasn't. It took time. But I was able to
remove each end connector from the sprue
trees with a sharp #11 X-Acto Blade, with no
need to clean up. That's not too bad.
The
real M4A1(76) Sherman used 79-links per
track run, and so did I on my miniature. The
individual links responded well to Testor's
Liquid Cement, allowing me plenty of time to
assemble mini-runs of five links at a time
and get everything lined up properly. No
sophisticated alignment jig was necessary,
just care and patience.
When I
got three mini-runs ready, I joined them
together into a longer run, for wrapping
around either an Idler or Sprocket for
shaping. I used Tamiya Masking Tape to hold
the completed track runs in place on the
model as they setup overnight. I
intentionally left the end of the runs
unconnected, so that I could take the tracks
off the kit for separate painting and
initial weathering. With some confidence, I
left the model alone for a couple of days,
actually.
I
can't express the joy I felt when I came
back to it and peeled the masking tape away.
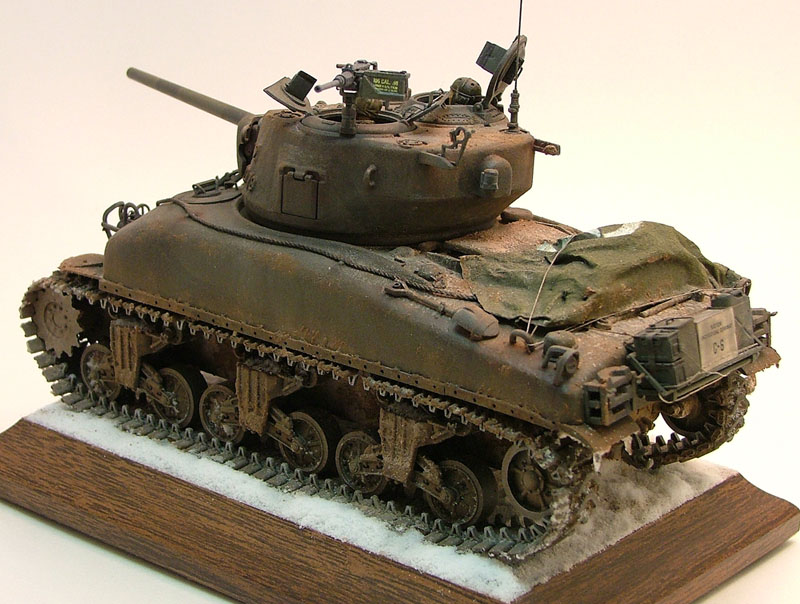
The photos are on Page One. It worked out
well, and I don't feel quite so apprehensive
about the Dragon Models individual tracks.
These proved so easy to put together and
mold to the Sherman suspension, that I can't
imagine going back to a poly-vinyl run and
having to deal with "floating" tracks again.
Spread
out over a year, I actually spent some 39
hours putting together Dragon Models' kit. I
wouldn't characterize it as a weekend
project, but it can be built and pleasingly
finished in a reasonable amount of time. I
went beyond what most might consider doing
in their project, but I had a good time
doing so. There is plenty of kit there to
keep you busy.
|