|
Of all
the M4 Medium Tank types deployed during
WWII, I am most attracted to the cast-hull
(curvy) Sherman variants. Visually, I find
them the most interesting. Anytime kits or
conversions come out in 1:35th scale for
modeling these variants, I'm drawn to them.
Naturally, when Dragon Models released their
Operation Cobra Sherman - I ordered two,
sight unseen, in eager anticipation of a
wonderful update to replace the venerable
Italeri offering of many, many years ago.
I'm not unlike the myriad Sherman modeling
fans out there...
As
with such a popular subject, with many
restored and preserved examples around the
world, one could assume a very high-quality
product from Dragon Models - with modern
research and production techniques to draw
upon. The model kit has found detractors and
supporters - like in every release - but I
found the overall experience one of joy.
Putting a little more effort into the basic
model kit pays off in the end, and the
forethought put into it by Dragon Models'
engineers presents the modeler a kit that
can really be a centerpiece of a collection
of 1:35th scale Shermans, without busting
the bank account to fashion a miniature up
to today's high-standard.
I ran
into a few kinks along the way, but in the
end was so satisfied with the product that I
bought another to keep in my collection for
future builds. This is my best endorsement
of a model kit or conversion.
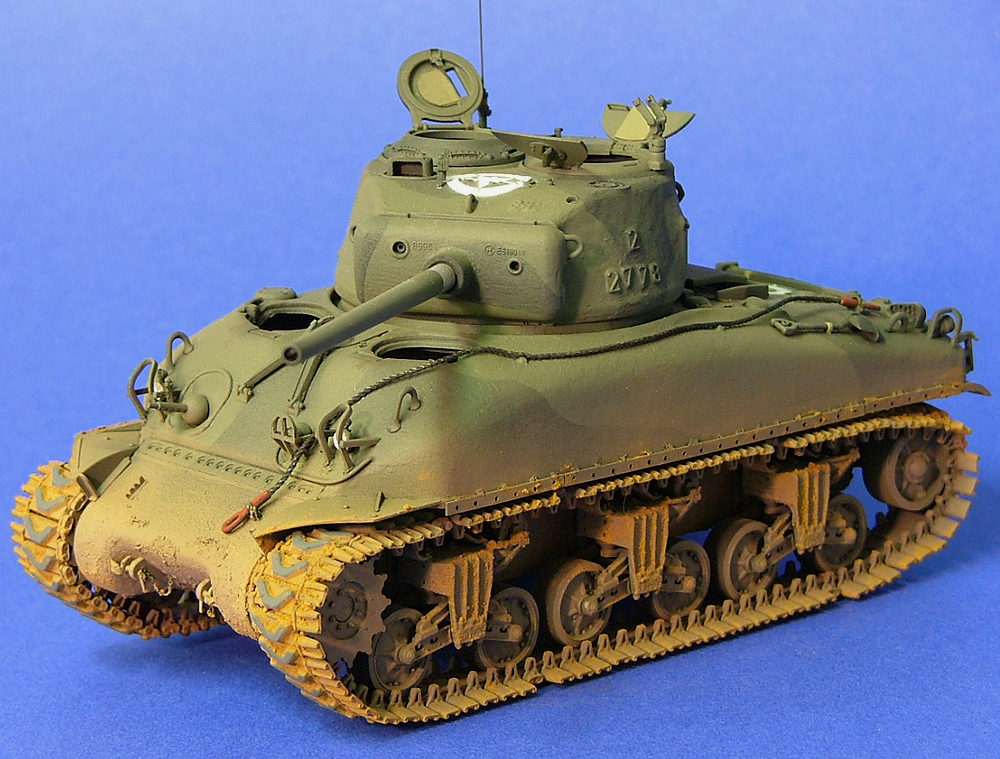
M4A1(76)W
Medium Combat Tank - Task Force Kane
I set
out to model a representation of one of the
first 102 M4A1(76)W Sherman Tanks sent to
the ETO in 1944, one assembled by Pressed
Steel Car Company. Unsure of finer details,
I consulted Kurt Laughlin for further
information. Kurt has done extensive
research on the M4 series of Medium Tanks,
and provided me photos of details I wanted
to add to the Dragon Models kit. Pressed
Steel Car Company did not have its own
foundry for casting components, as far as
Kurt has uncovered, and there were not
casting or foundry symbols to add to the
exterior of my miniature's Hull. Union Steel
provided the 76mm Gun Turrets to Pressed
Steel Car Company for adding to the Hulls -
which are noteworthy for their relatively
huge casting numbers on the sides of the
Turret.
This
is a feature that is not widely known
amongst Sherman Tank modelers, and a risky
thing to add for a typical model contest.
This time out, I was definitely in the
mindset to model the tank for myself and go
against the ridiculously over-weathered,
drybrushed, filtered and highlighted
miniatures that are popular eye-catchers in
contests & magazines - to model an
example of a Pressed Steel Car Company
assembled M4A1(76)W as it would have
appeared in 1944. The oversized casting
numbers had to stay. In Steven Zaloga's
Osprey Modelling book covering the M4 76mm
Sherman Tank, there is a photo of this
turret type with the large casting numbers
on the flanks on Page 78 to help ease a
worried mind about this incorporating detail
feature. It sure made me feel better.
Having
recently purchased George Winter's book
covering the Battle for Frieneux (Frieneux
and La Mormenil - The Ardennes, JJ
Fedorowicz Publishing, ISBN: 0921991207), I
was greatly impressed at the quality and
effort to recount this battle in December
1944. He brings information and thoughts
from participants on both the American and
German sides of the battlefield to provide
an overview that the reader can almost
visualize in their minds.
I
settled on wanting to model three M4A1(76)W
tanks that fought in the Battle for Frieneux
- two of them were Panther killers, each
knocking out two Panthers a piece. I chose
to give D-32, SSGT Reese Graham's tank a go
for this project. Unfortunately, Graham's
tank is the not included in the photographs
inside George Winter's book, but others are,
and helped to get an idea of what his might
have looked like. I would have loved to add
a "nickname" to Graham's tank - but I could
find no reference to one in the historical
text.
I also
chose Graham's tank because I found it
interesting that his crew was short a member
(more so than "normal" for short-manned
Sherman crews) - Graham doubled as both Tank
Commander and Driver in the battle. For
those who are familiar with the design and
cramped interior of the M4 Medium Tank, one
can't help being quite impressed that SSGT
Graham could actually sight a tank in the
Commander's Cupola and then snake down
through the interior to get to the driver's
position, more than once, during the
engagement, and score two Panther tank
kills.
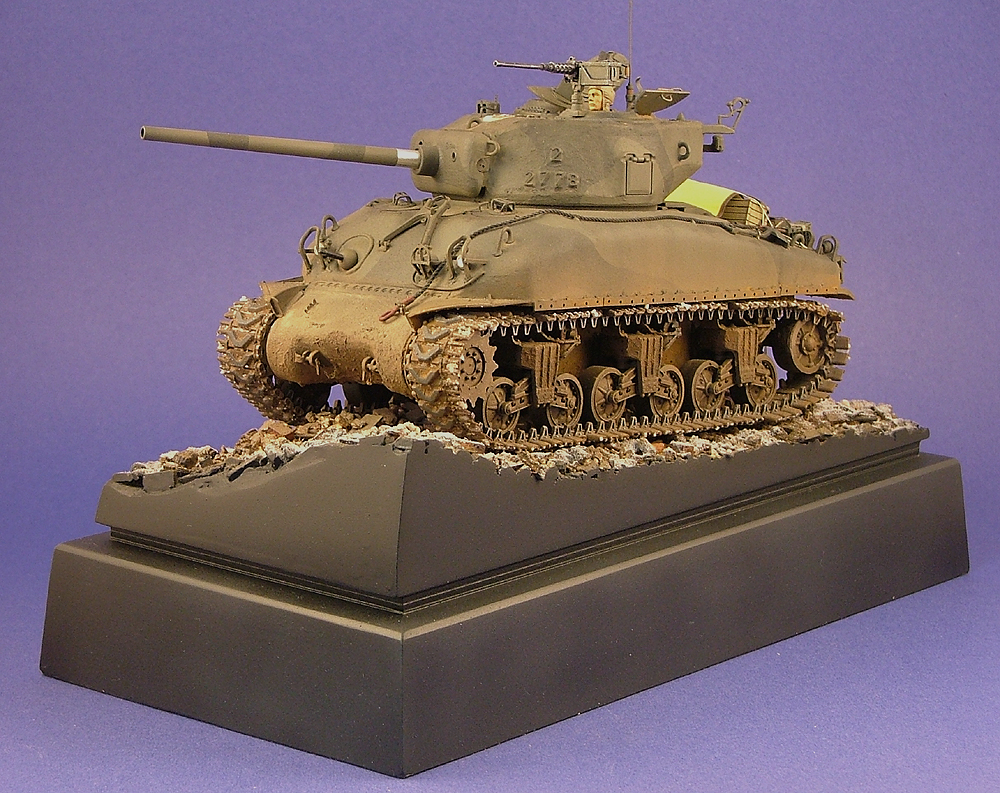
Desiring
to generally model the engagement, but not
one particular moment in time, I opted to
position my figure representing SSGT Graham
depressed in the Commander's Cupola - to let
the observer decide whether or not Graham is
ducking down to bark firing orders, coming
back up to sight a Panther or heading down
to the driver's position to move the tank
for a better shot. Of course, those not
familiar with the combat action will not
understand why the Tank Commander figure is
depressed in the Cupola - and this detail
tends to work against a modeler in a typical
contest.
Like
the Union Steel casting numbers on the
Turret sides, contest be damned! This was
becoming a fun project. To model the Tank
Commander/Driver and Loader, I used Dragon
Models Figures. I thought I'd try my best to
keep this project "all-Dragon" as much as I
could because I have never really given a
Dragon model subject full attention like
that before. In the end, I really liked the
way it all worked out, and discovered I
probably had been missing some fun before
doing so.
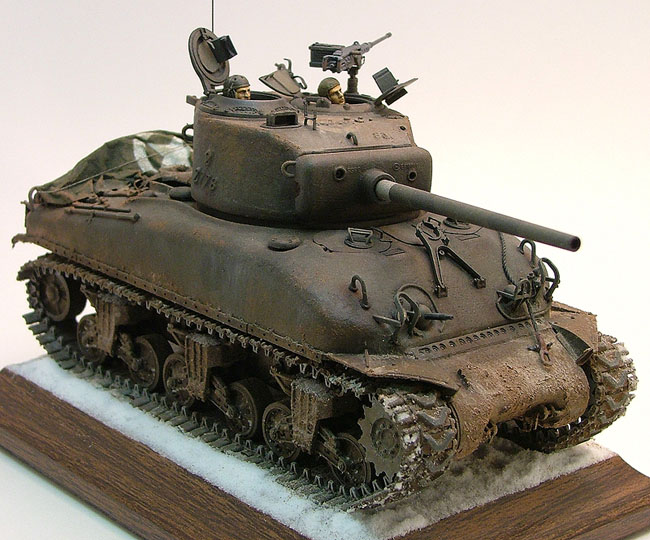
The
engagement occurred on 24 December 1944. The
field in which the Panthers approached the
village of Frieneux was snow-covered, and
the night before was bitterly cold - but
none of the vehicles appeared to be covered
with snow. So, again risking the ire of
judges (which was becoming fun at this
point) I only hinted at some snow and mud
accumulation on the track end connectors.
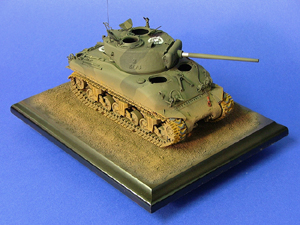
Not putting this miniature on a scenic
display base to convey the detail is not a
wise thing to do for a contest. I eventually
opted to stop being so stubborn (stubbornly,
I might add) and chose a scenic base for it.
Shown in the final photos is a really nice
resin base I purchased from Masterpiece
Models at the 2007 IPMS/USA National
Convention in Anaheim, California. It proved
a great deal, and simple but effective way
to display a little bit of that time period
for the model. I recommend checking out
Masterpiece Models' items for your work too.
Graham's
tank began the engagement between two houses
facing the field through which four Panthers
were crossing to attack Frieneux. Due to
some low depressions in the field, Graham's
tank was not able to depress their 76 low
enough to get a decent shot, however. A
short distance away, another Sherman tank
near a woodpile and house was also drawing a
bead on the approaching Panthers - but - its
tracks were frozen solid into the ground and
it could not move. Graham left his position
to attempt to tow that tank out of its
precarious position. Unsuccessful at the
attempt, with Graham's tank still attached,
one of the approaching Panthers scored a
killing shot of the stuck Sherman. It took a
bit of effort before Graham's crew could
disengage themselves from the knocked-out
Sherman. When they did so, they returned to
their previous position between the houses.
From here, still unable to get a good shot
at the approaching Panthers, Graham spotted
a column of Panthers on advancing down a
road behind this group, some 2000+ yards
out. They got off two rounds, which both
knocked-out each Panther they fired upon.
On my
model, I opted to leave the Tow Cable in
stowed position. Time isn't indicated in the
historical coverage of the battle, but I
question whether or not Graham's crew had
the opportunity, or really would have
attempted, to stow the Tow Cable after
disengaging from the destroyed M4A1(76). I
probably limited myself in representing a
particular episode during the battle to a
time before trying to break the fellow
Sherman out of frozen ground. In retrospect,
this wasn't a major concern on my part at
the time. Still isn't - though I wonder if
they left the Tow Cable attached to the
knocked-out Sherman...
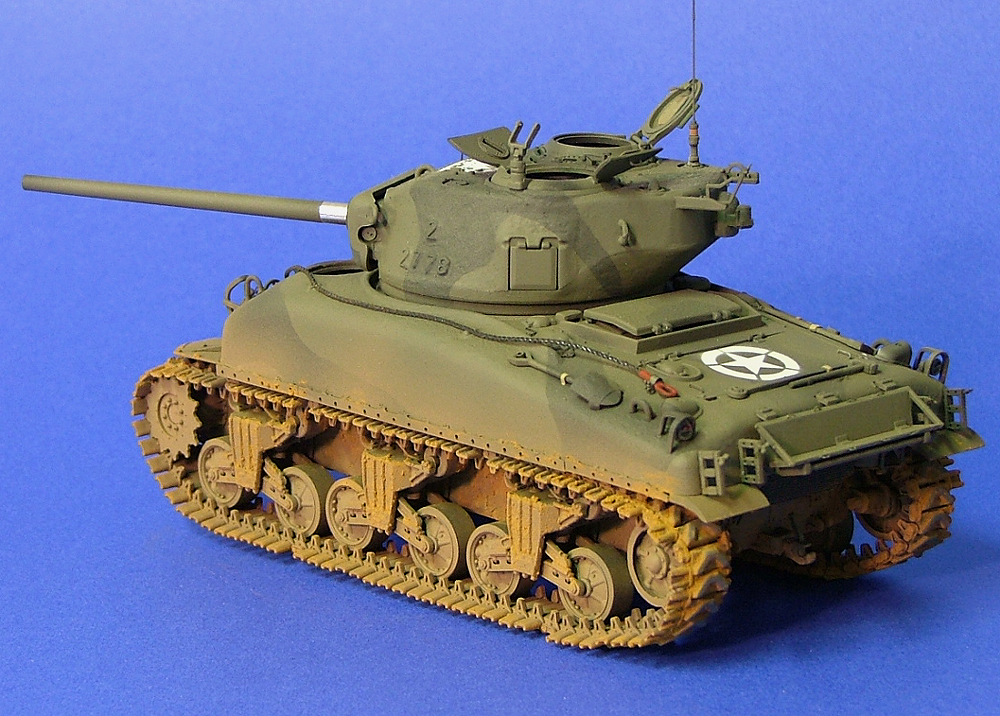
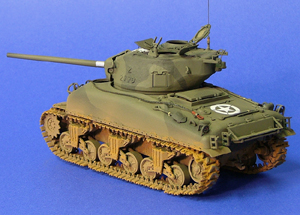
Lastly,
consulting the photos of this unit's Sherman
tanks, I did not place a lot of markings on
my miniature - they were a minimum of them.
Same for external stowage - they were not
overloaded for a road march. I added the Air
Recognition Panel, going with yellow for the
time period, and using the older 12-foot
panel instead of the newer short version.
All
told, and extended due to illness in 2006,
it took me over a year to build and finish
this miniature. Sticking with it and finding
the joy of constructing and detailing it for
that long is probably a good indicator of
how I feel overall about the Dragon Models
product. I recommend it for Sherman fans out
there - both for one looking to add a nicely
detailed model to their collection and for
the modeler wanting to work it into a
hyper-accurate replica. It is a good
foundation for both approaches and accepts
your efforts well.
Building
Dragon Models #6083 Operation Cobra
Sherman
Though
I was quite taken when the impending release
of Dragon Models kit was first announced, I
have to admit some perplexing feelings
during the construction phase. Of course, no
model kit is perfect, and I guess I wasn't
expecting perfection as much as I was
expecting to be blown away - due to all the
pre-release hype. I tried to ignore any and
all reviews of the kit too, to avoid being
prejudiced pro or con before my examples
arrived. So, while I recount my experience
building the kit, forgive me if I state
something that has already been commented on
in prior reviews or discussions.
I
wound up spending as much time on building
this kit as I would have on the older
Italeri release. I'm of two minds with this
statement: on one hand the Dragon Models kit
offers some interesting improvements and
details over Italeri #225 and is a modern
tool technology wonder in some places; on
the other hand I still put in as much effort
to build and detail it as would be put into
the Italeri kit - not to bring it up to any
other standard but what I'd want in my
personal collection.
So,
being of two minds, I look at the experience
as positive because I actually wanted to add
all the effort to the basic Dragon Models
kit. It was fun and I thought the kit really
encourages a modeler to put the effort into
it. And, though the venerable Italeri kit is
the nearest contemporary to this Dragon
Models release, I didn't think it useful to
compare kits produced decades apart.
|
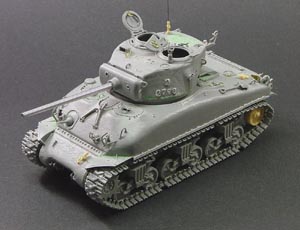
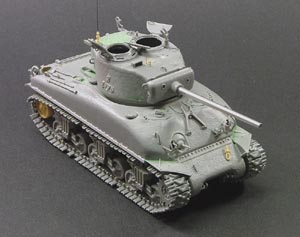
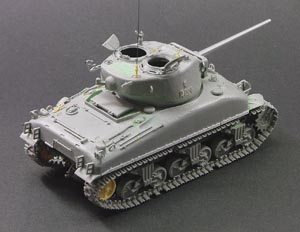
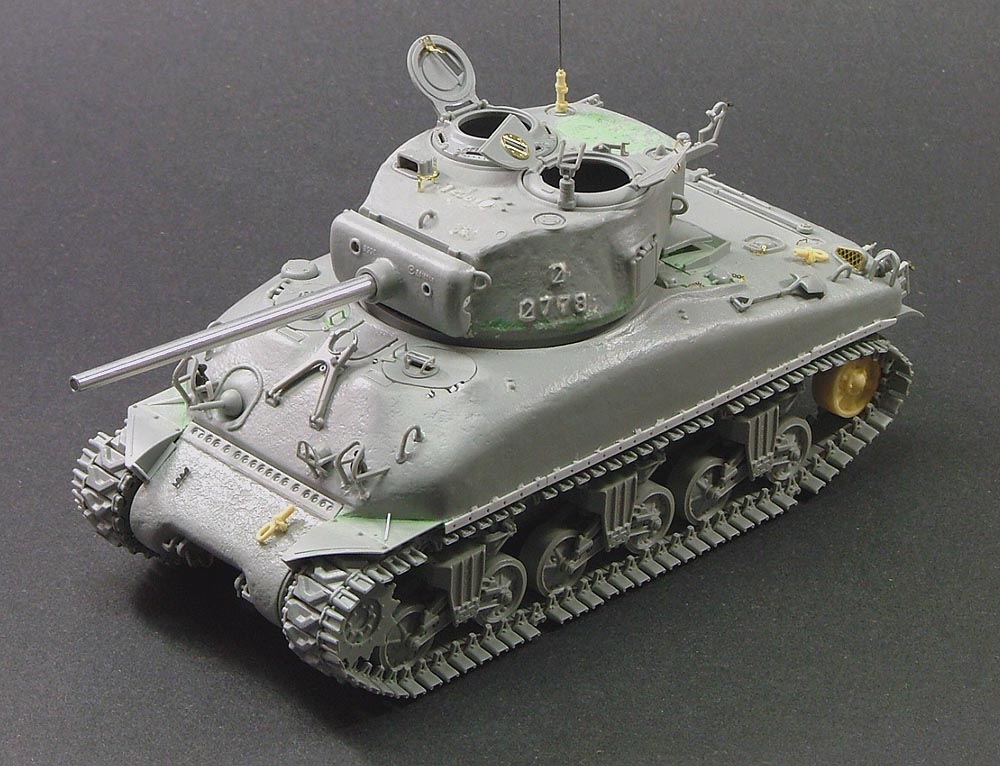
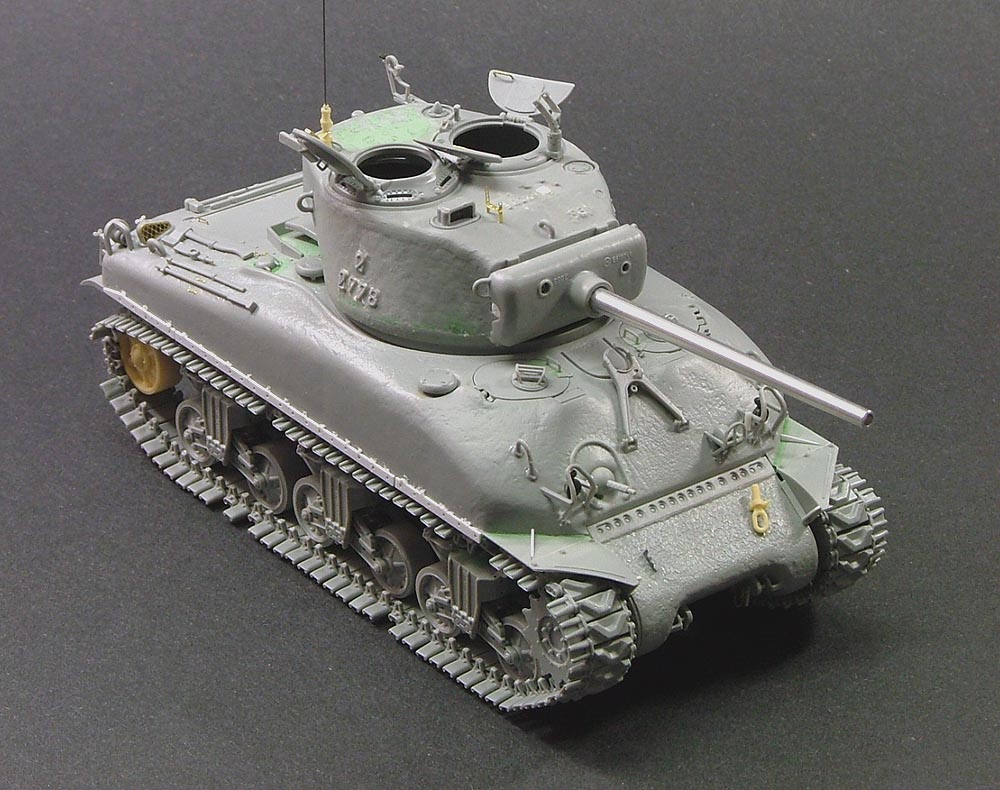
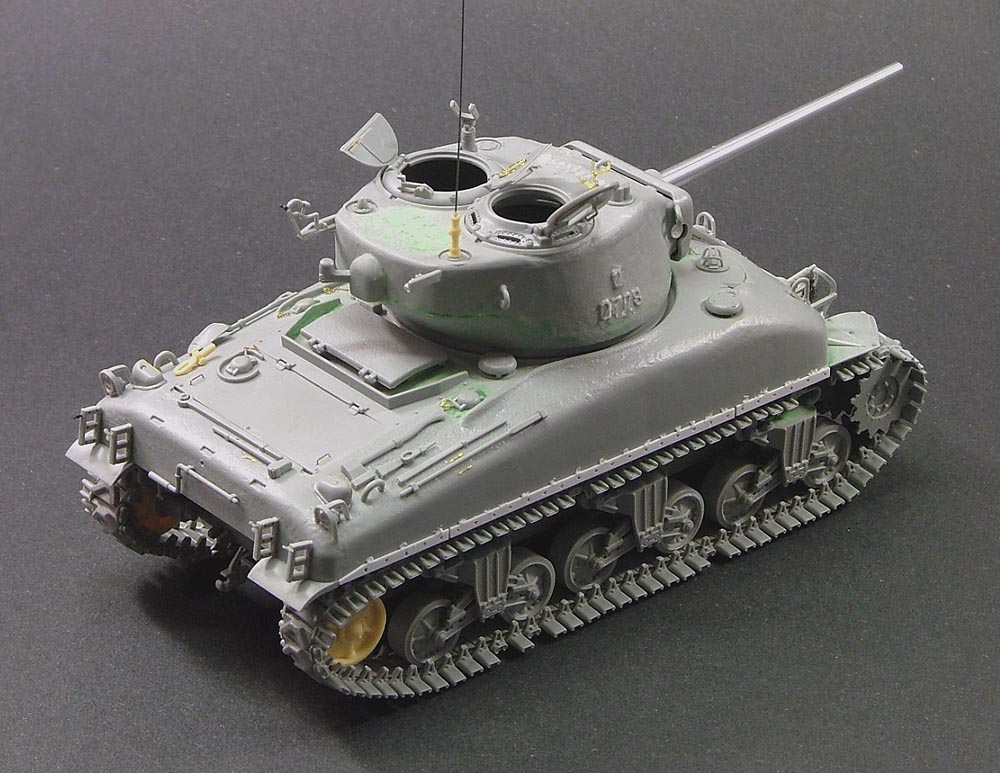
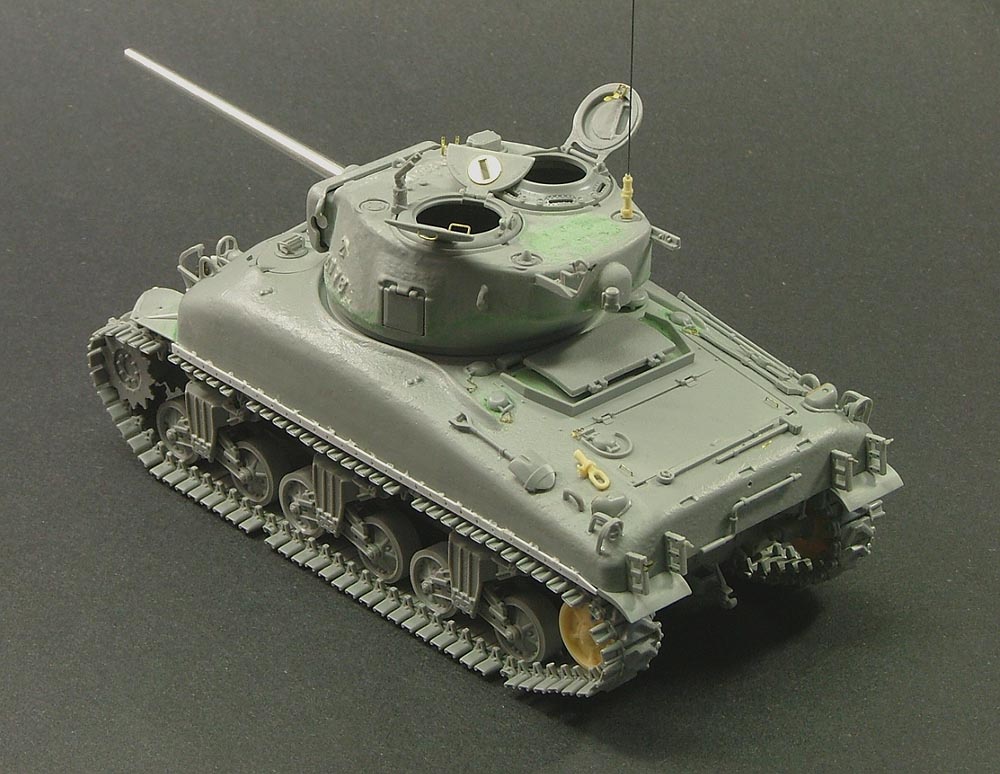
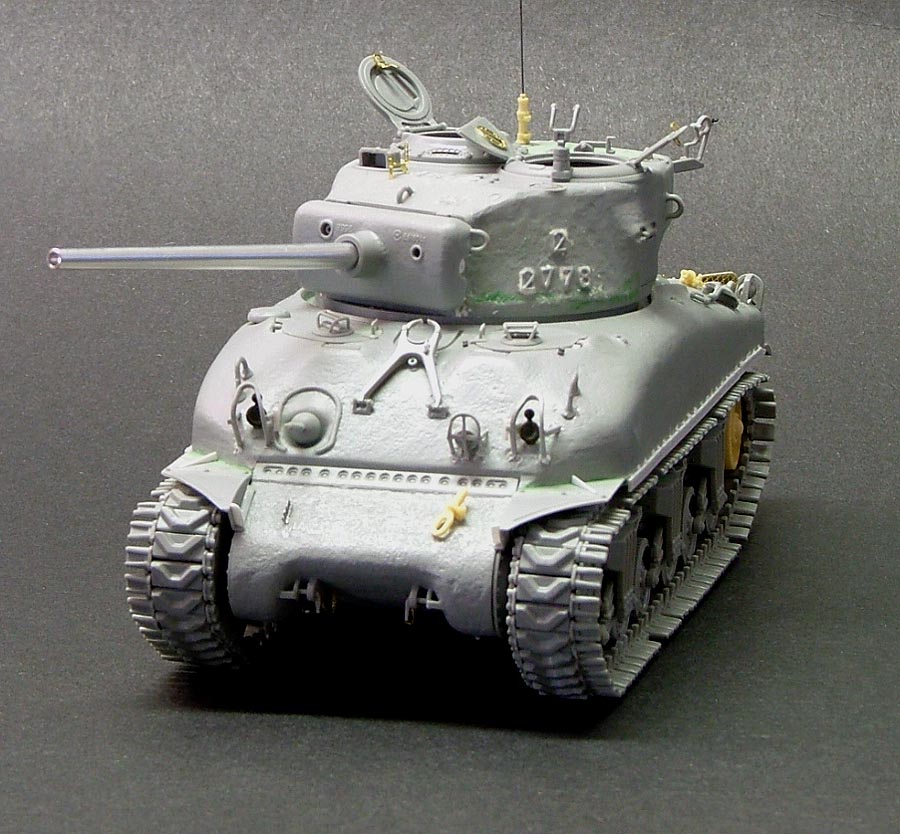
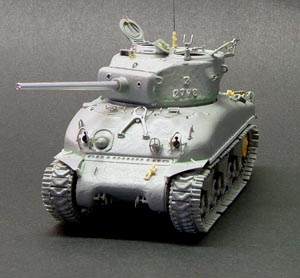
In the
photos above, I am about 90% through the
assembly of the Dragon Models kit, with a
few minor details yet to be fitted and or
changed. In BNP (bare naked plastic) the
Dragon Models Operation Cobra Sherman is
very attractive. A shame to put paint on it
actually. After fussing and complaining
about detailing efforts prior to this point,
sitting it there to look it over made the
work worthwhile. Personally, I need a pause
in a modeling project at this phase to
regroup and get energized again about
finishing it. If I had written a review on
the kit at this point, I might have leaned
more towards complaining about the extra
work called for in putting it together - and
neglected pointing out what's good about it.
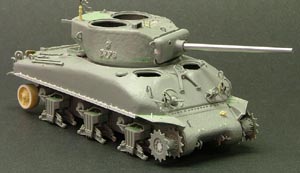
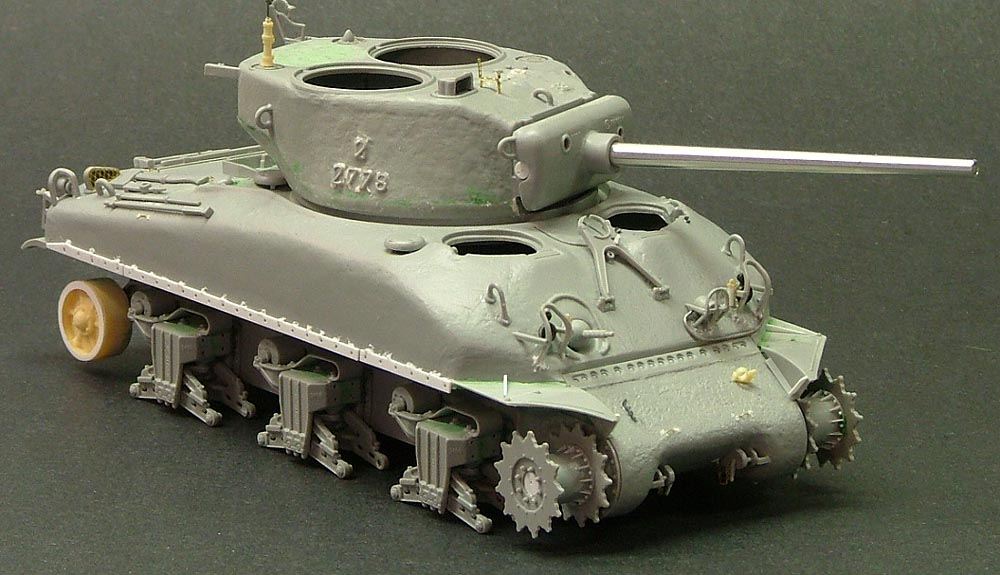
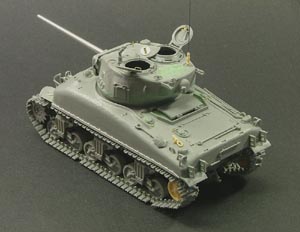
Above,
I decided to work on the Drive Sprockets and
Idler Wheels before painting. I added a ring
to the outer edges of the Formations Models
Idler Wheels to represent the detail on the
actual items - I've not seen this detail on
any other Sherman model parts before. I'm
still looking though. I also added the
details inside the Dragon Models Drive
Sprockets - though perhaps this effort might
go unnoticed in the final result. I felt it
added depth to an already richly detailed
model kit. Sometimes I debate the effort
versus value of adding details like this,
but always rationalize it as " if you are
having fun - do it! "

Moving
through the finishing steps, I didn't take
any photos of the model during priming - I
figured viewers who've been to my site
before have seen me do that. After all, I
have been priming my models in flat black
since 1983, how interesting can that be
after all this time? But, if someone is
still interested in that step, I'll pay more
attention to it in the future.
I used
a combination of acrylic paint brands for
finishing on this project. The black
camouflage color is a mix of 2/3rds Tamiya
XF-1 Flat Black to 1/3rd Tamiya XF-64 NATO
Black. I thinned this mix 80% with Lacquer
Thinner so as not to obscure the fine cast
texture Dragon cast into their Hull. Some
have complained about it being over done,
but under thin (very thin) coats of paint -
I think it captures the essence of the
actual vehicle well. I like to mix Tamiya's
NATO Black with Flat Black because it has a
subtle greenish hue that works well with
weathering out Olive Drab. Also, in 1:35th
scale, Flat Black straight from the bottle
is too dark for this application, the NATO
Black softens it up. The camouflage pattern
was done freehand with a Badger 150 set at
18psi. I was careful to get the demarcation
between colors sharp, as at casual viewing
angles in 1:35th scale, the feathering would
be slight, appearing sharp.
Though
I would not use it ultimately, this is the
pallet/base I used to begin
finishing/weathering on the miniature. I
would take the pallet all the way through
application of field grass and snow to help
work out the finished model. Ultimately, I
felt a little limited in the type of terrain
I would display the model upon. I went with
a plain display base at first - but in
retrospect, it probably under emphasized the
miniature more than spotlighting the work.
Display Bases are a tricky thing for
modelers, and though they are supposed to be
ignored in a contest - they often provide
tangible "presentation" points to otherwise
objective judges. Choose your presentation
method carefully.

As bit of a mixed bag of
old features found on previous Sherman model
kit releases coupled with some new details
and innovations - offset by curious
omissions and shortcomings, Dragon Models
#6083 Operation Cobra Sherman is an
impressive 1:35th scale model kit
nonetheless. Even if you choose not to
undertake any of the correction steps I did
while building this model kit, you will end
up with a pretty nice representation of the
US M4A1(76) Sherman. And, though Dragon
Models endeavored to cram as much detail and
parts into this kit, you'll still be
compelled to dive into your spare parts box
for more options. As most Sherman modelers
will attest to, the "scavenger hunt" for
detailing parts for their Sherman Tank
project is half the fun of the chase.
|