|


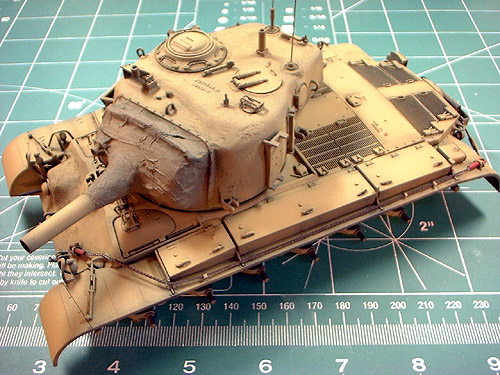
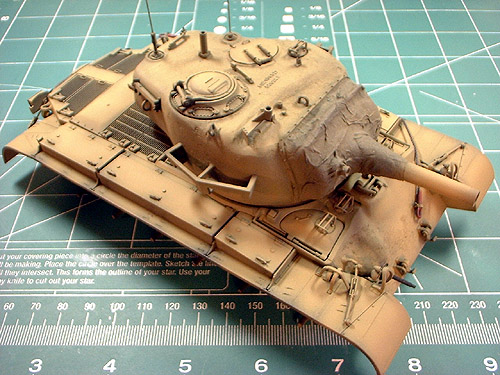
Basic painting and initial
weathering and paint fading on upper
surfaces. I use Tamiya acrylics all around.
At this stage, I attached the Tow Cable. It
is made from the two eyelets provided in the
Tamiya model kit and a length of nylon
string cut 18' 6" in scale length. I
inserted the Tow Cable ends into the two
Tank Workshop Clamps, and then superglued
the nylon string into the trenches molded
into the underside of the Tamiya parts -
rotating them upside again. I got lucky in
pre-positioning the Clamps at just the right
distance for securing the Tow Cable. For
variety, I also painted the two eyelets
Tamiya XF-7 Flat Red to break up the overall
drabness of the tank's finish.
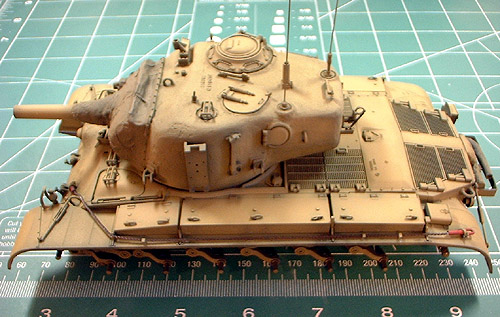
I also decided to attach
the inner portion of the Return Roller
Wheels at this time. Anticipating fitting a
new set of tracks to my miniature, I'd use
the Return Roller Wheels as a guide for
positioning my track. Also visible here, I
decided not to "activate" my suspension as
offered in the Tamiya kit. I used
appropriate bolts to replace the screw
details.
While waiting for coats of
paint the dry, I went back and stared at
photos of the Korean-era M45 Pershings.
There aren't a lot of photos of different
vehicles, but I was looking specifically for
tracks. I've seen one or two with the Rubber
Block tracks, but most of them appeared to
be T-80E1 Steel Block shoes.
|
This thwarted my plans to
use the AFV Club rubber blocks. I went and
ordered a set of the Steel shoes.
This brought up another
change in my model. The Tamiya Drive
Sprocket fits their polyvinyl representation
of the all-steel T-81 single-pin tracks
provided in the kit perfectly - naturally.
The
T-81 tracks were 24 inches wide. Though the
later T-80E1 tracks were 23 inches wide
(correctly done in the DML kit) - the Tamiya
Drive Sprocket wouldn't fit the DML or AFV
Club Tracks - being too small interestingly
enough.
Option
One would be to retrofit the DML Drive
Sprockets to Tamiya's kit in order to use
either their or AFV Club's track link sets.
The Tamiya Sprockets have a female
connection - and wouldn't you just know it -
the DML Sprockets are a male connection to
the Drive Housing. I did successfully cut
off the prong and bored out the DML
Sprockets with a 7/64" drill bit to fit to
the Tamiya kit, but was faced with another
snag.
A
highlight of the Tamiya Sprockets is that
they casted the six lightening holes in the
hub - where DML did not. Okay, undaunted to
this point, I drilled out the holes in the
DML Sprockets - but try as I might, I still
liked the looks of the Tamiya Sprockets
better. Consulting the photos of the M45
Pershings it appears that some of them (if
not all) were equipped with this earlier
style of Drive Sprocket. If you go looking
at Pershings in service you'll notice that
there are three different types of Drive
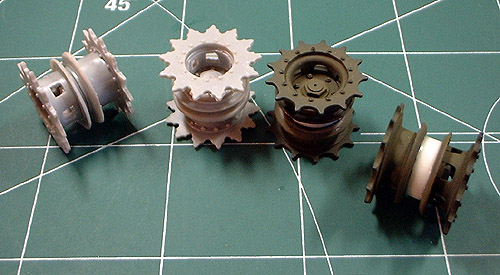
Sprockets fitted to the tank. Below photo -
note the early style link from Tamiya on the
right, and the later style from DML on the
left. The third style is a "laced" type
Sprocket like on the M4 Sherman - just if
you weren't confused enough.
The
service photos led me to Option Two -
widening Tamiya's Drive Sprockets to fit
either the DML or AFV Club T-80E1 track
shoe. This also was the simplest thing to
accomplish in the end - it only took 1/4th
the time it did to drill out the DML
Sprockets. I cut two sections of Evergreen
#234 .438" - 7/16" styrene tubing to splice
between the Tamiya Drive Sprockets, after
sawing them down the middle between the
Guide Rings. I performed this surgery after
painting - so I know you can do it just as
easily beforehand.
The
above photo shows the modified Tamiya Drive
Sprockets alongside the DML Drive Sprockets
I worked on beforehand. Not strictly correct
in measurement between the two Guide Plates
- this was more than close enough for me as
a detail compromise. The DML and AFV Club
T-81E1 track shoes are pretty close in
overall measurements - the real difference I
noted was that AFV Club's shoes were just a
hair broader literally - not worth even
measuring. My set of T84E1 Rubber Block
track shoes wouldn't go to waste however -
my Italeri M47 Patton is sitting there
waiting for a replacement set of tracks
anyhow...
The
tubing slips snugly over the plug already
present connecting the halves of the Drive
Sprocket. A run of five track links was put
together and used to align the Drive
Sprocket halves correctly when I rejoined
them. The only thing I would wind up
accounting for was the Guide Horns on the
tracks as I wrapped them around the Drive
Sprocket - to make sure the additional
thickness of the tubing wouldn't prevent
proper seating of the track run around the
Sprocket. This modification allowed me to
fit either of the three track link sets I
had to my model miniature.

|