The model
kit assembles quickly. Above is part of the
first assembly step. The TIE/Ln is 1:72nd
scale - small is an understatement. The
detail, however, isn't small. It is
exquisitely rendered, without ejector pin
marks neither marring delicate details nor
flash on any parts. Simple cleanup is called
for in constructing the model. All
instructions are in Japanese, but the
pictograms and painting instructions are
simple enough to follow.
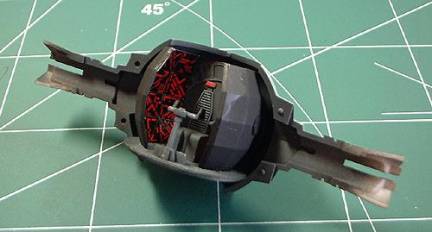
The rear
and side walls of the cockpit round out the
second assembly step. I left these separate
for easier painting and finishing. The
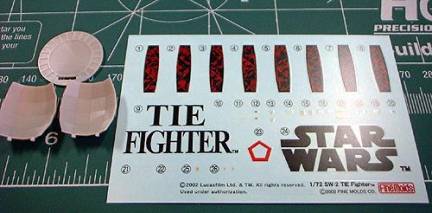
cockpit is pretty cramped. Also, Fine Molds
provides these fine decals for finishing the
interiors of the sidewalls - much easier to
apply with them separate from the cockpit
subassembly.
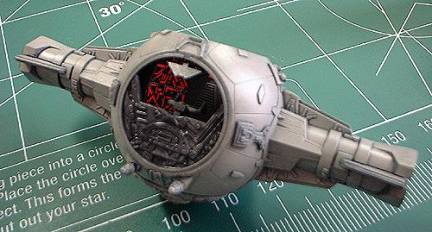
In the
third step, you'll clean up the forward
portion of the spacecraft, and attach a
small console to the interior ceiling. The
detail cast here is remarkable for such a
little model. Aligning the console is easy -
just take your time.
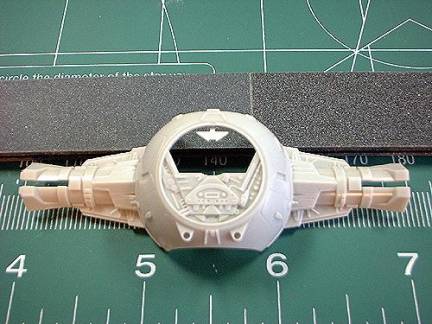
Test-fitting
the center section of the spacecraft, there
appears to be no seams, warpage, or gaps to
contend with later on. I noticed that
careful and intelligent removal of parts
from the sprue is called for in constructing
this model kit. It will save you from
filling gaps later on as result of removing
too much plastic in cleanup.
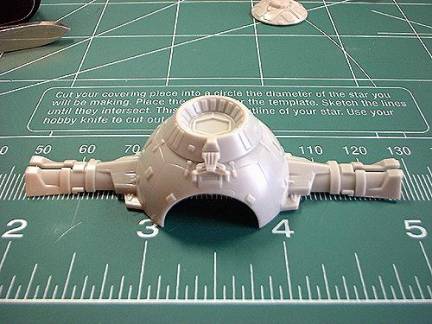
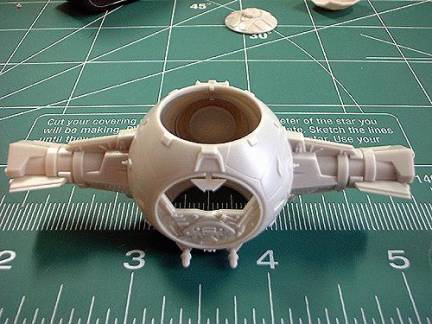
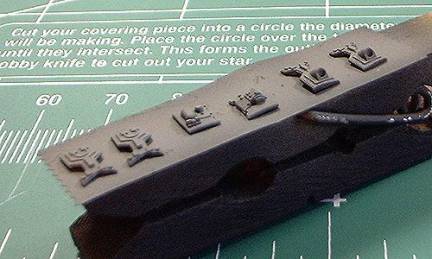
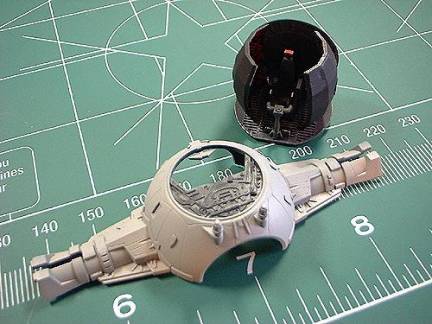
Entrance
into the TIE/Ln Fighter is via a large hatch
on the rear of the Pod. It appears to be an
engine fairing, but is not. Drawings of the
TIE/Ln from SW-IV: ANH indicate this as the
primary ingress/egress point. The hinge
detail is even finely done in this model kit
- note the tiny M4 Sherman Bogie Truck in
the photo below. This kind of detail is
commensurate with the same methods the
original model makers used in building the
studio models. It is great to see it
replicated by Fine Molds in this release
too.
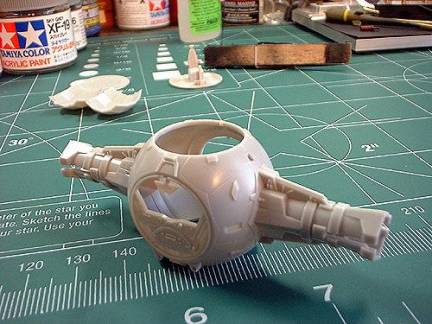
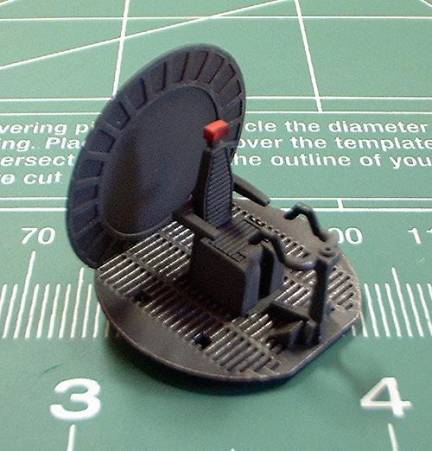
The engine
exhausts are situated to either side of the
rear hatch - represented by Parts #A14 - and
not shown here. Leave them off to paint
separately if you're building a TIE/In
variant. Parts #A13 represent the Sensors c
and I left them out in the photo below. It
goes for these two parts if you're going to
build the TIE/In.
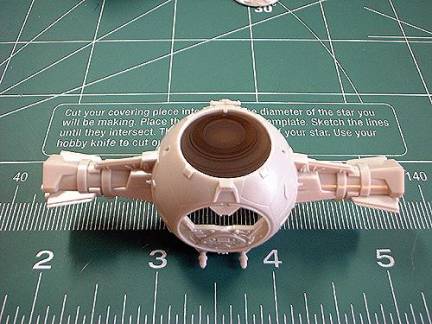
In drawings
of the TIE Fighter, this hatch is identified
as part of the SFS (Sienar Fleet Systems)
I-a2b Solar Ionization Reactor. However,
studio drawings from SW-IV: ANH identify
this as the primary ingress/egress of the
spacecraft. As for reasons pointed out in
the Star Wars Technical
Commentaries, I too
subscribe to the hatch description being
more commensurate with the spacecraft shown
at this time period.
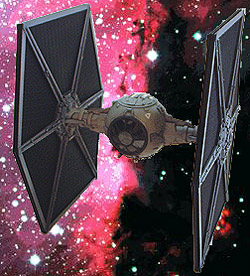
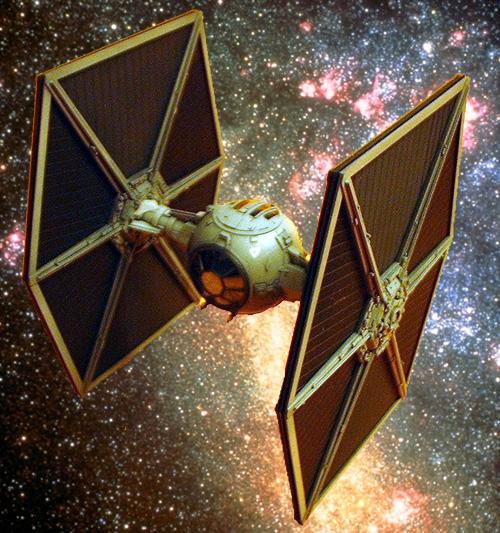
Fine Models
#SW-2 represents the early model TIE Fighter
commonplace in the end days of the Old
Republic, up through the events described in
SW-IV: ANH. It is a good representative of
the Imperial Attackers in the Battle of
Yavin.
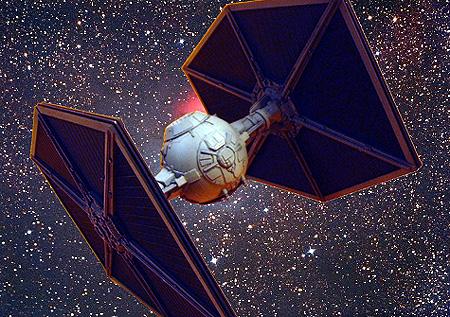
This model
is equipped with laser cannons also used in
the TIE X1 (Lord Darth Vader's ship)
variant. The TIE Fighters that defended the
first Death Star (SW-IV: ANH) were all
equipped with this type of armament - dating
the Fine Molds model kit.
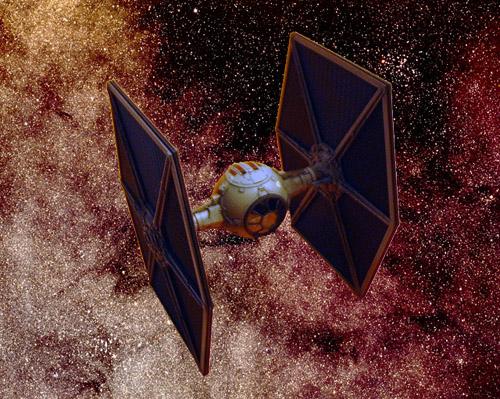
TIE
Fighters appearing in SW-V: ESB and SW-VI:
RTJ displayed plain, colorless, laser
emitters and were much faster. The TIE/Ln
Fighter variant also appeared whiter in
color than the later TIE/In Fighters that
appeared in Episodes V and VI. The TIE/In
Fighters have darker, multi-hues due to
different alloys used in their manufacture.
Painting instructions in the Fine Molds
model kit allow the modeler to represent
these features. An easy way to visually
represent the TIE/In completing this model
kit would be to either not paint the tips of
the emitters orange, or replace the laser
cannons altogether.
Some fans
subscribe that the secondary hatch (top) is
the primary ingress/egress point for the TIE
Fighter - either the entire hatch flipping
up and back, or the hatch split down the
centerline and opening to either side like
in the Kenner toy. In comic continuation
stories, this hatch is actually displayed as
the point from which the TIE Pilot can
escape via an ejection seat. There is no
interior or exterior hinge detail provided
in the Fine Molds model kit to suggest this
as a primary hatch for the Pilot, I believe
correctly so.
Fine Molds
includes painting masks to aid the modeler
in finishing their kit. These have to be cut
out yourself - it took me longer to do this
than it did to cut out - and cleanup all the
parts and complete basic assembly before
painting. The masks are low-tack, and adhere
best if the part is clean and has no finger
oils present. I cleaned up the parts with a
Q-Tip before putting the masks on. I've read
other modelers complaints about using these
masks, but I had no problem with airbrushing
them. I don't use enamels, so bleed-under
the edges weren't a problem for me. Tamiya
acrylics were just fine.
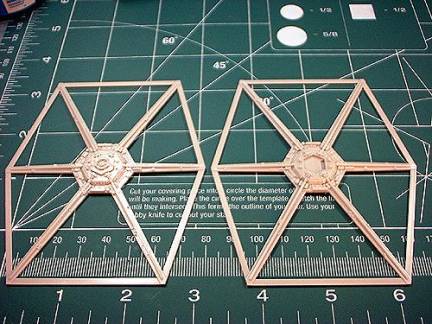
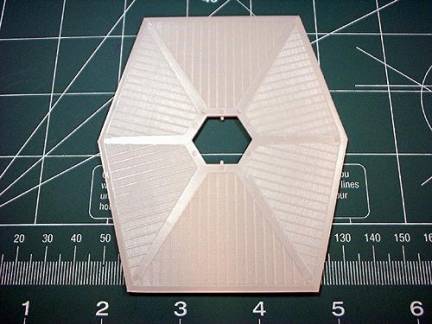
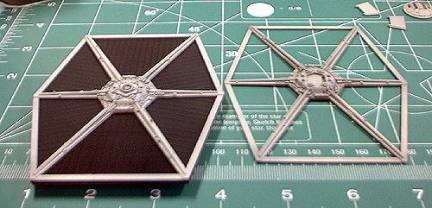
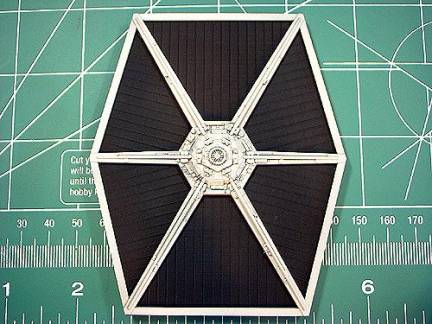
Cleaning up
the Wing Panels completed the basic assembly
steps. Labeled Solar Collector Arrays in
most drawings, I don't quite agree with this
description. I think of them more as heat
dumps or exchangers for the power reactor.
The idea of solar power arrays in the deep
space environ where this fighter operates
doesn't make much sense - even for Sci-Fi.
(Note: the
term -solar ionization reactor - probably
does not mean the same as what we understand
"solar" to mean. Consulting the 1994 Star
Wars Vehicle Blueprint Portfolio, which was
authorized by LucasFilm, both the TIE
Fighter and the Imperial Star Destroyer
carry central power units under this
designation. The massive dome underneath the
Star Destroyer is labeled the same as the
tiny powerplant in the TIE Fighter. There
are no "solar collection arrays" on the Star
Destroyer, though. Han Solo's infamous
reference to "parsec" as a unit of speed -
when it is a unit of distance - is another
example of this in his description of making
the Kessel Run (SW-IV: ANH). I like to
imagine these little bumps are places where
C3PO while telling the story translates the
word used in our language - but it doesn't
carry the same meaning.)
The ejector
pin marks appearing on one side of the Wing
Panels are completely hidden by attaching
the Wing Braces above - another thoughtful
engineering plus from Fine Molds. The
casting of detail on the Wing Braces and
Panels is just breathtaking.
I
proceeded to painting my model spacecraft
the next day - painting in subassemblies and
like colors. Desiring to replicate the
TIE/Ln, I selected to finish it in a lighter
color overall to mimic the early ships. I
would use Tamiya acrylics throughout
finishing. The overall exterior color would
be XF-19 Sky Grey with the Solar Collector
Arrays done in XF-69 NATO Black. The
interior of the Command Pod would be XF-53
Neutral Grey with XF-1 Flat Black Control
Yoke & TIE Pilot. I'd detail the TIE
Pilot in varying shades of Black later on
while the rest of the subassemblies dried.
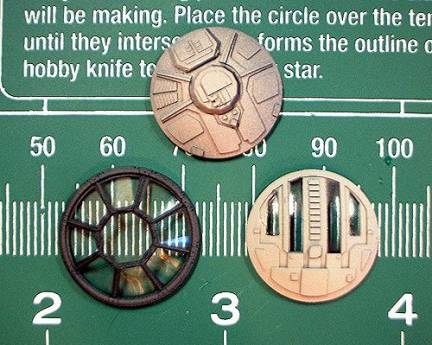
During
painting, I had to be careful and inspect
the Fine Molds masks on the clear parts -
they tended to pull up at the edges. I
burnished them back down with a toothpick
and quickly moved on to the next color. I
recommend the fast-drying acrylics over
enamels in this area - as they'd most likely
bleed-under the masking as they dried. It is
also possible to use the Fine Molds masks as
templates to cut your own - just more time
consuming that's all. Below are the Top
Hatch, Bottom Hatch/Power Cell Cap, and
Viewport.
Painting
this model called for everything to be
painted before final assembly, then spot
touch-ups along the way. No problem here,
other than it's a whole lot smaller than a
1:35th scale tank. Small-scale AFV modelers
will like building and finishing this model
kit. I built and completed the TIE/Ln in a
single weekend - haven't done that in years!
Below right are the two Ps-4 Ion Engine
System Thrusters, center parts are not
identified in drawings of the TIE/Ln or
TIE/In but look cool, and the pair on the
left are the Fabritech Sensor Array Panels.
All are painted to contrast with the overall
color of my TIE/Ln - but I did not paint the
newer alloy panels, which would indicate a
TIE/In model.
For the
final assembly, I opened up the Instruction
Sheet again, and started from the beginning.
For such a small model - and mostly because
it does not exist in reality - I found
opportunity to highlight small items inside
the Command Pod to help make them stand out
in the dark interior when the model is
buttoned up. I selected a silver PrismaColor
oil pencil because the color would best
catch the meager amount of light that
entered the Command Pod. The Imperial TIE
Fighter, though numerous and considered
expendable by Rebel Alliance Pilots, was
very well maintained. They were refurbished
after every mission - a TIE Pilot could
reasonably expect to get into a near-new TIE
Fighter on each mission. I wanted to add a
little in way of maintenance scuff marks and
such to give the Spartan interior a little
more interest. I even picked out the
headrest in XF-7 Flat Red to make my TIE/Ln
a bit more unusual.
|
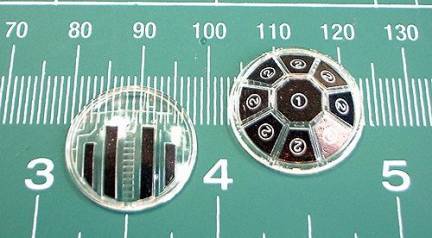
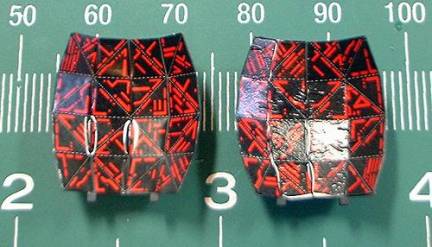
Without the sidewalls
in place, the Cockpit sub-assembly kind
of looks like the original Time Machine.
The addition of decals for the
instrument status lights on the
sidewalls in the Cockpit is a welcome
addition by Fine Molds. Painting raised
detail would have been a bit sloppy. Of
special note here: the decals do not
need any extra coaxing to lie down on
the model parts. In the photo below, I
used Micro Set on the left-hand
sidewall, and to the right I applied
Micro Sol. Notice the edges of the decal
curling up with the more aggressive
Micro Sol. Id have to dilute this with
water carefully applied with a fine
brush and wait for it to dry to smooth
those edges back out - nervously.
Eventually, they did straighten out
acceptably. Note: this decal detail for
the Control Tiles is not entirely
accurate - they don't cover the entire
surface of the Cockpit Walls. But, since
this is a kit review - I put them all
on. It makes for a busy, if not
bewildering, display inside the cramped
Cockpit.
In painting
my Wing Braces, I decided to weather them
(fade) a bit more than the Command Pod - for
further visual interest. I wanted a
compromise between the stated solar
collection purpose and my suspected heat
dump/exchanger function. Also, when I looked
at the TIE Fighters on the movie screen, my
eyes are always drawn to the Command Pod. I
wanted a little contrast between the Wings
and the Pod to also draw the viewers eyes in
the same way.
The Wing
Braces snap-lock tightly into the center
hexagon of the Solar Collection Array
Panels. I applied tiny drops of super glue
inside the area that would be hidden from
view. There is no need to apply glue to the
outer edges of the Wings - unless you were
sloppy in removing the parts from the
sprues, or warped them during cleanup. There
is no doubt that having the Wing Braces
separate parts from the Solar Collection
Array Panels make the most striking feature
of the TIE Fighter easy to render for even a
novice modeler. No masking is necessary if
you paint the parts separately and are
careful to mate them in the end.
The front
bulkhead of the Cockpit (immediately behind
the viewport) was hand-painted XF-53 Neutral
Grey.What I did here was actually "wash" the
area with the Neutral Grey 80% thinned with
Lacquer Thinner. This served to remove the
airbrushed XF-19 Sky Grey down to the XF-1
Flat Black primer more than to "paint" the
bulkhead Neutral Grey. I liked the effect.
With the sidewalls in place, the Cockpit
really looks cramped. Reminds me of Lord
Darth Vader's Meditation Chamber aboard his
Command Star Destroyer.
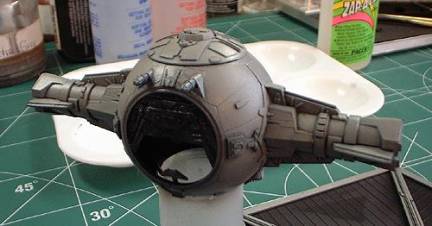
When all of
this dried, I proceeded to continue the
assembly per the Instruction Sheet. Putting
the halves of the Command Pod called for
some minor cleanup along the horizontal
seams, but the Fine Molds model kit goes
together so well, this was a simple task to
seal and touchup.
The Cockpit
slides into a recess and key cut into the
rear half of the Command Pod. There is a
little slack in the fit, so make sure you
align it properly before mating the front
half of the Pod. Make sure it is seated all
the way back into the rear half - you'll
know it isn't when you have difficulty
attaching the front half of the Pod. When
its aligned properly, and seated all the way
back into the rear half, the front half of
the Pod easily slips on.
To
accentuate the fine panels lines engraved on
the surface of the Command Pod, I used a
diluted wash of Payne's Grey oil paint (why
not, I thought - this spacecraft never
existed anyway). This is a complementary
color to all the grey tones that I used to
paint my model. I kept the wash really light
- as though solid dark lines might look
striking - I think them toy-like in the end
result. TIE Fighters also made planetfall -
not spending all of their time in deep space
- so this affords a modeler a little more
option in finishing their model kit, and the
wash looks suitably - "dirty". My model
would represent such an Imperial Craft, one
that routinely made planetfall in addition
to deep space patrol duties. The above photo
is a favorite; the decals Fine Molds give
you really dresses up the interior of the
Cockpit from certain angles. In the photo
below, the Command Pod is inverted during
the oil wash; a ready-made handle is found
in the cap from my bottle of Zap-A-Gap.
(Note: The
bluish wash with Payne's Grey oils, though
thin, darkened the overall tone of the XF-19
Sky Grey to a familiar tone I'm accustomed
to watching on the screen. Anytime you wash
with oils, remember that you're going to
darken the tone of your paint finish -
select a slightly lighter shade.)
Both
Command Pod and Solar Collector Arrays
(Wings) were treated to the same wash with
Payne's Grey colored oils. Though I opted to
lighten up the overall color on the Command
Pod, the wash helps to tie everything
together (pun intended).
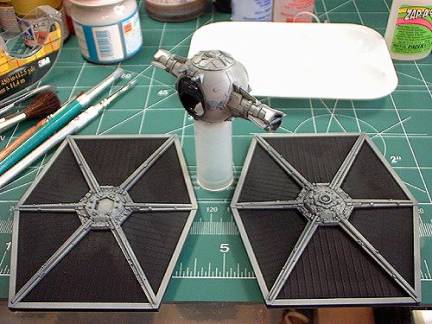
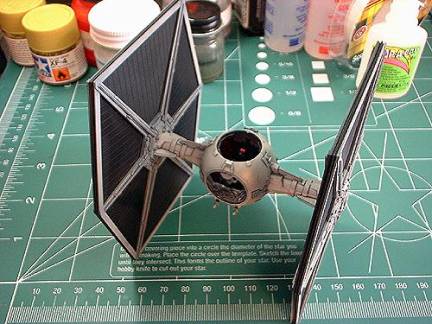
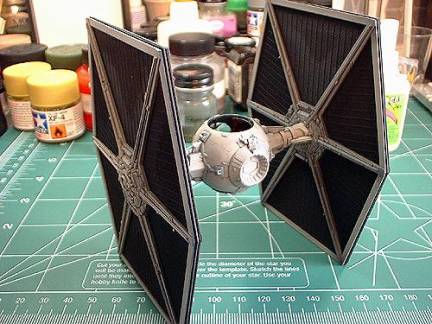
Attaching
the wings is simple; Fine Molds engineered a
positive lock and a deep enough cavity at
the attachment point to make alignment
child's play. I left the top hatch off in
the following photos to let the paint, super
glue, and oils out-gas completely overnight.
No need to rush at this point.
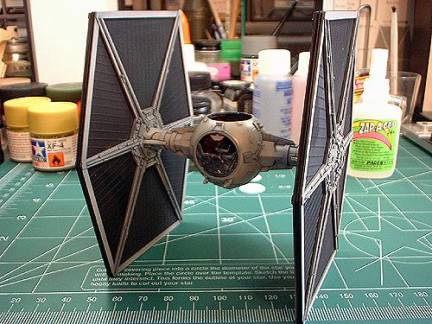
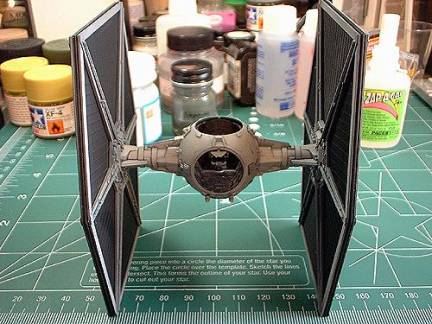
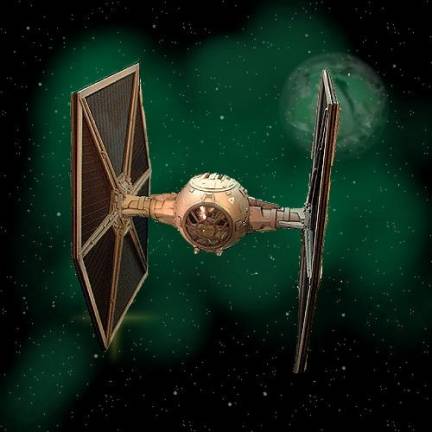
A favorite
view - head-on. The Fine Molds model really
captures the look of this Imperial
aggressor.
The model
is nearly done at this point. Gotta park my
TIE Pilot into his Command Chair. The Pilot
is simply airbrushed with XF-1 Flat Black,
and then brush-painted with X-1 Black to
pick-out the polished portions of his flight
gear/helmet. Fine Molds even provides decals
for adding Imperial Fleet insignia to the
Pilots helmet and shoulders, but I painted
mine with XF-2 Flat White. The figure has
simple, but soft, details. A little
drybrushing will help "animate" this figure
when you put it into the Command Chair.
Then comes
the Viewport - left off to allow the paint
and glue to breath. It was easy enough to
fit into place. After I attach the top
hatch, I added an identification marking to
my model made from a scrap of white
dry-transfers and called it complete.
My TIE/Ln
represents one of a squadron of defenders
based in-system near an important Imperial
Trade Route. Not considered a frontline
squadron, but not a backwater assignment
either, I envisioned this unit would keep
their TIE/Ln's a little longer than the rest
of the Fleet - which would be converting to
the TIE/In at this time. The Imperial
Garrison would be based planetside, which
meant my TIE/Ln would see atmospheric flight
and landings as well as space-based
assignments. The small markings and IDs
would be for both ground-based and
space-based support personnel in maintaining
the small fighter craft. TIE Fighters are
not commonly seen with a great deal of
markings, so I kept mine to a reasonable
minimum.
I hope you
can tell how highly I think of this release
from Fine Molds. It is simply an outstanding
model and a pleasure to build and finish.
They are worthy of carrying on the Star Wars
legacy in model miniature form with work as
fine as presented here.
|