I had to come up with the
standard Turret Bustle Rack for the Sheridan
- as there was none included in the Jaguar
Models kit. Unfortunately, the Academy kit
only includes an example of the
field-modified Rack done up by the 11th ACR
in Vietnam, and doesn't include a standard
Rack either - nothing to pilfer there as
well. Can you believe neither kit has the
standard rack?
I've never seen a photo of
"Hard Core 7" from the rear flanks, so I'm
hoping that it doesn't have an unusual field
modified Rack fitted. I made my Bustle Rack
frame using .050-inch rosin core solder,
bending and shaping it by eye into something
I felt approximated the Rack appropriately.
For the floor of the rack I used a bit of
brass micro-mesh from Scale Scenics. It is a
bit fine, but I think it looks okay for the
intended purpose. I wasn't concerned with
100% dimensionally accurate parts as much as
I wanted to just model the basic equipment -
so that I could later fill it up with Crew
gear and stowage.
Lastly, I decided to keep
the Shield in front of the Commander's Hatch
because I had already modeled it - I didn't
want to take it off because I like the way
it looks. My miniature won't completely
match the photo of "Hard Core 7" from 2/69,
so forgive me for a little creative license.
As
trying as it turned out to be getting the
Suspension Arms, Road Wheels and Tracks to
agree to work together - I decided to cut my
losses and glue as much in place before any
priming and painting commenced. I'd rather
spend extra time picking out paint details
by hand than trying to coax unruly parts
into position after painting and finishing
commenced. This model is really heavy, but
once everything setup, it is suprisingly
tough and withstood a lot of handling and
years sitting in a plastic storage bin
waiting for me to get back to it.
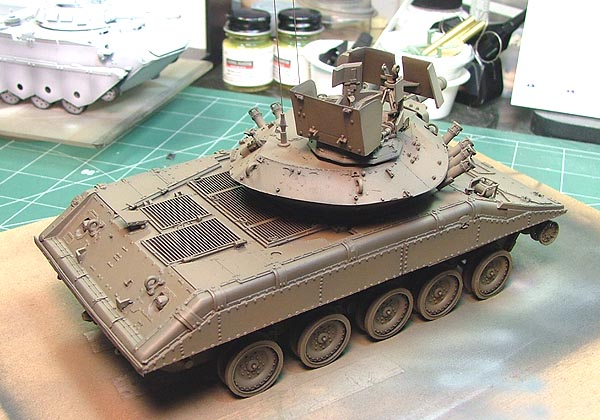
I
primed my miniature with Tamiya Acrylic XF-1
Flat Black, with and overspray of the base
color coat being Polly Scale Acrylic
#F505370 Olive Drab. This color has a nice
brownish darkness to it that I hope will
finish out nicely in the end.
The
Jaguar Models resin kit was clean and there
was no need to give it a soapy bath to
remove mold agents - something I've never
had to do with AFV related resin products so
far. With the color coats going on, the
beauty of Jaguar Models' castings became
apparant quickly, and I got excited about
the project again.
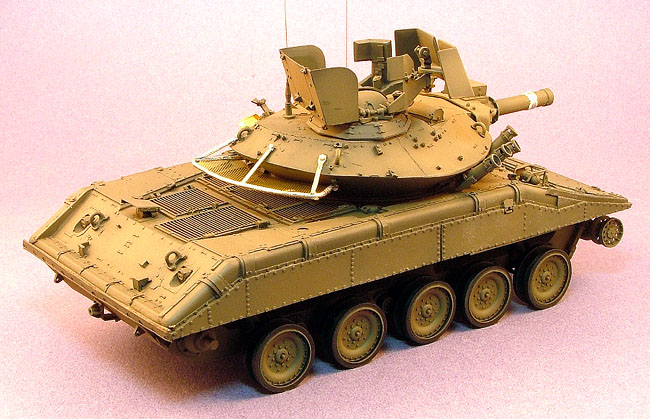
Evidenced
by the type of Smoke Grenade Launchers and
Bilge Pump Exhausts on the rear panel, the
Jaguar Models Sheridan kit exhibits later
production features and I pretty much left
little details alone. I added the side
panels for the Headlight Guards and the Trim
Strip from Eduard's photoetch detail set. I
was going to also add the slotted Bilge Pump
Exhaust covers from the Eduard set to my
miniature too, until I learned that the late
production vehicle covers do not have slots.
|
I picked
out the Road Wheel Rubber by hand with
Vallejo Game Color #51 Black, mixed with a
drop or two of Ammonia to keep the paint
from drying too fast, and flowing easier.
This reminded me why I prefer to airbrush
Road Wheels, as it took a good amount of
time to handpaint them. Did you know the lip
around the Road Wheel Rims isn't perfectly
round? I didn't until I began
handpainting...
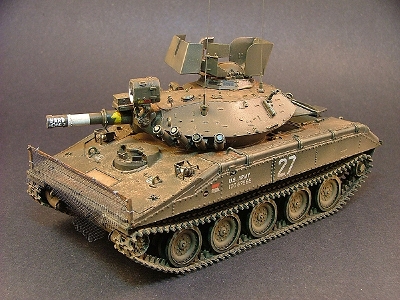
Since
I changed my mind over the years between
starting and re-starting this project, some
details had to be added or changed
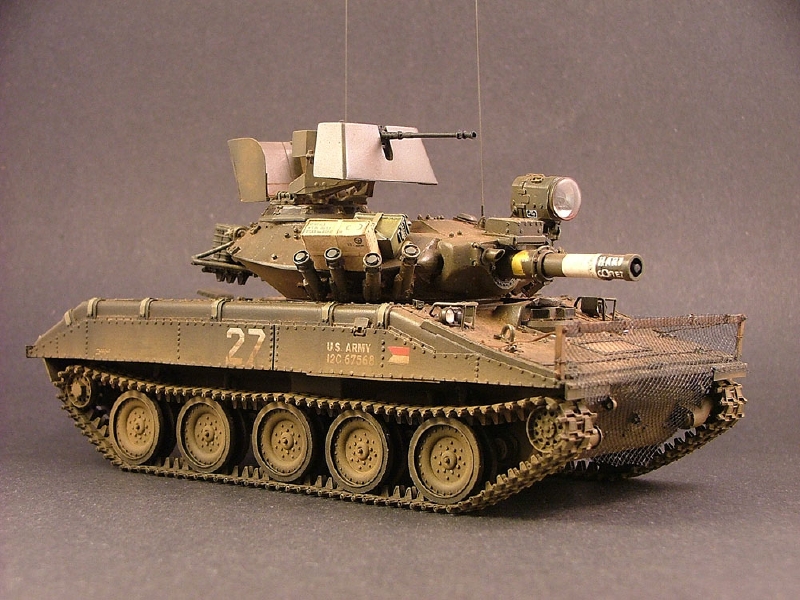
mid-stream. I added the band around the Gun
Barrel / Launcher seen on some of these
vehicles in Vietnam circa 1969 using a 18mm
length of .010-inch lead foil. This band was
welded around the Gun Barrel / Launcher to
cover up the mounting holes for the earlier
bore evacuator tube. Seemingly typical for
this miniature project, locating the Band
demonstrated Academy's decals for "Hard Core
7" to be too large to fit properly - so I'd
be doing my own in the end anyway. The
photos show the acrylic paste I used for the
welds around the Band before it dried and
was lightly sanded back down.
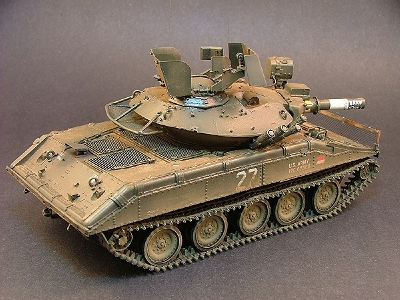
Modeling
"Hard Core 7", I also felt compelled to come
up with the anti-RPG screen rigged up by the
crew on the front of the vehicle as it
appeared in a photo taken in February, 1969.
I don't know how long it remained there, but
it is unusual to be sure. The only thing
holding me back was how ugly it makes the
"Rhino" (a nickname of the Sheridan) looks.
Before messing around with that, I fitted a
Jerry Can Holder to the Turret using a
photoetched Accurate Armour part - though
the Jerry Can can be attached to the Turret
in a different manner. I just love Accurate
Armour Jerry Can Holders and I wanted to see
how it looked in place. Ultimately, I
decided not to use it on the final
miniature.
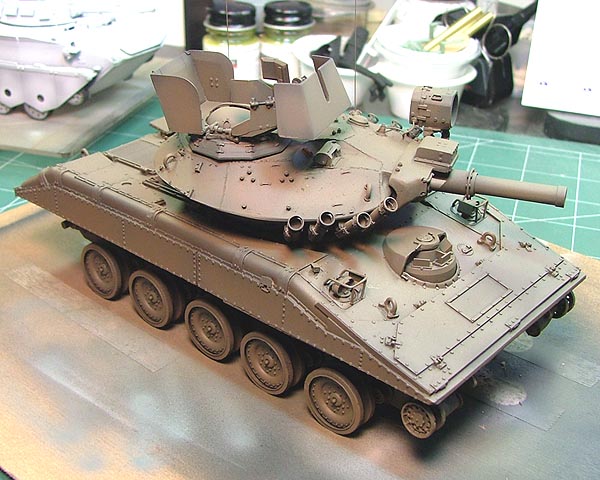
I used
Evergreen #291 1.5mm Angle styrene stock for
the two uprights, and Evergreen #124 .05 x
2.0mm styrene strip for the crossbar and a
couple of Grandt Line bolts to complete the
anti-RPG Frame. It is difficult to see in
the photo, but I assumed the uprights were
welded to the corners of the upper hull. I
can't really make out how the cyclone
fencing is attached to the anti-RPG Frame,
however, so I winged-it again.
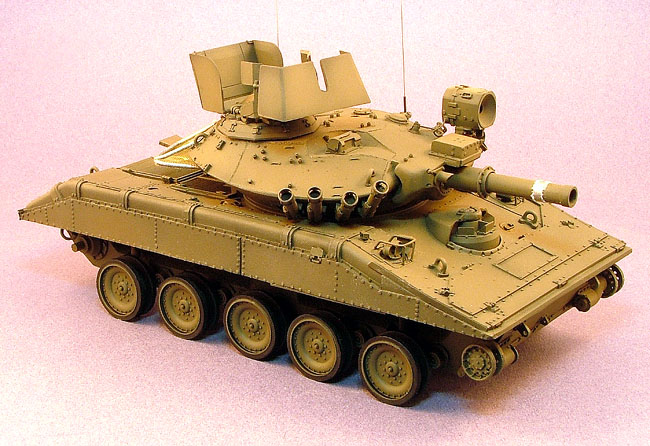
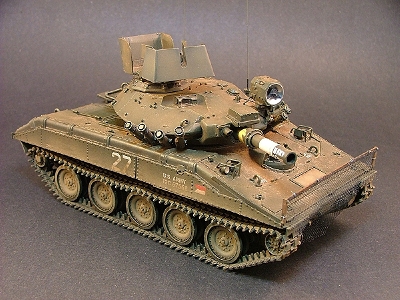
Painted
and retouched, the additions blend in well
with the previous parts. Again, looking at
the painted Jaguar Models Sheridan keeps me
interested in progressing towards completing
the model. It captures the stance and look
of the "Rhino" well.
One of
the things I held off on was coming up with
something to do about the large cutouts on
the lower hull. The Sheridan's I've seen in
virtually every photo that you can see
underneath the sponsons show these areas
plated over, and the only mention I could
find in the Technical Manuals that I have
describe the Crew having to use a chisel to
remove these plates when servicing the Bilge
Pumps fore and aft on the vehicle. I do not
know for sure, but I suspect these areas
might be filled with styrofoam like sections
of the upper hull for flotation purposes.
Perhaps it was removed at a later time.
I wish
I had accomplished this detail feature when
I set out putting the model together in the
first place, and not having to do it now
after the Road Wheels are fixed into place.
|