|
 I
loved this model kit! Sure, I love virtually
all wheeled military vehicle kits (except
for perhaps the Italeri HEMTT) but, this
model is really a joy to build, has
wonderful and thoughtful detailing present
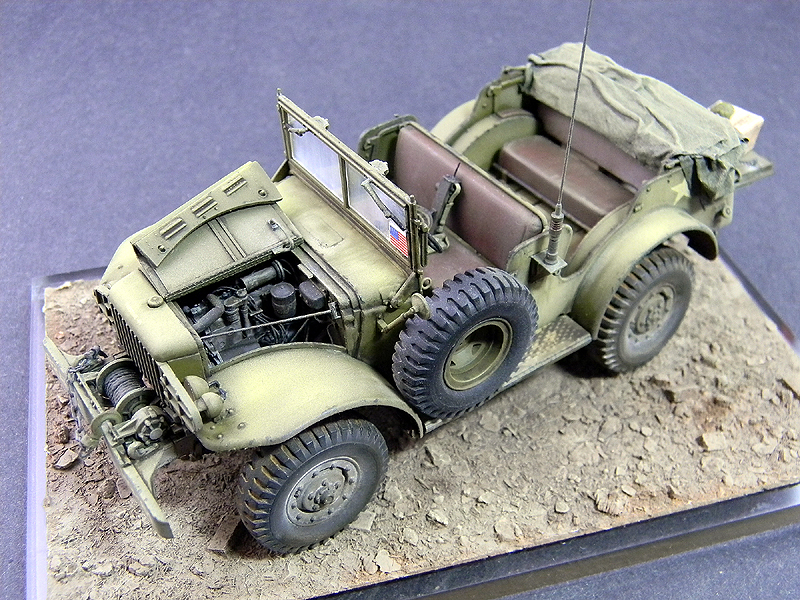
(even a curious addition with the Battery
being located in the engine compartment
instead of the Battery Box on the right side
running board) and engineered for easy
painting and assembly. Anyone can find
something to gripe about in a model kit, but
I liked it the way it came just fine.
Another excellent effort from Skybow fills
an important gap in my miniature military
vehicle collection. I
loved this model kit! Sure, I love virtually
all wheeled military vehicle kits (except
for perhaps the Italeri HEMTT) but, this
model is really a joy to build, has
wonderful and thoughtful detailing present
(even a curious addition with the Battery
being located in the engine compartment
instead of the Battery Box on the right side
running board) and engineered for easy
painting and assembly. Anyone can find
something to gripe about in a model kit, but
I liked it the way it came just fine.
Another excellent effort from Skybow fills
an important gap in my miniature military
vehicle collection.
As my
work schedule really got hectic in September
of 2000, I found this model kit also a good
subject to visit in the small chunks of time
I had between work hours. Thus, it took me
far longer to complete it than any other
recent model.
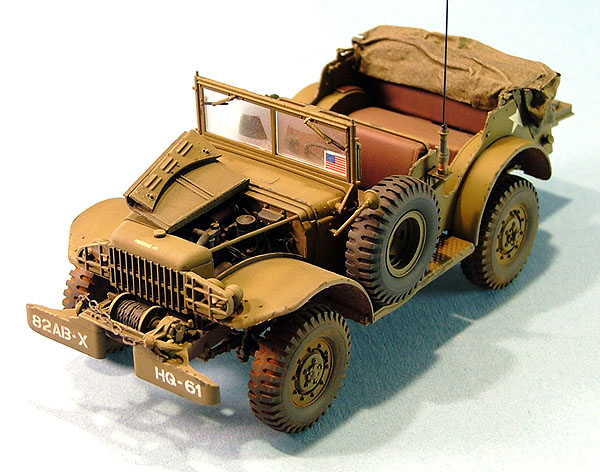
Aside
from not adding the aforementioned Battery
to the Engine Compartment, I didn't find the
need to add much of any major parts to the
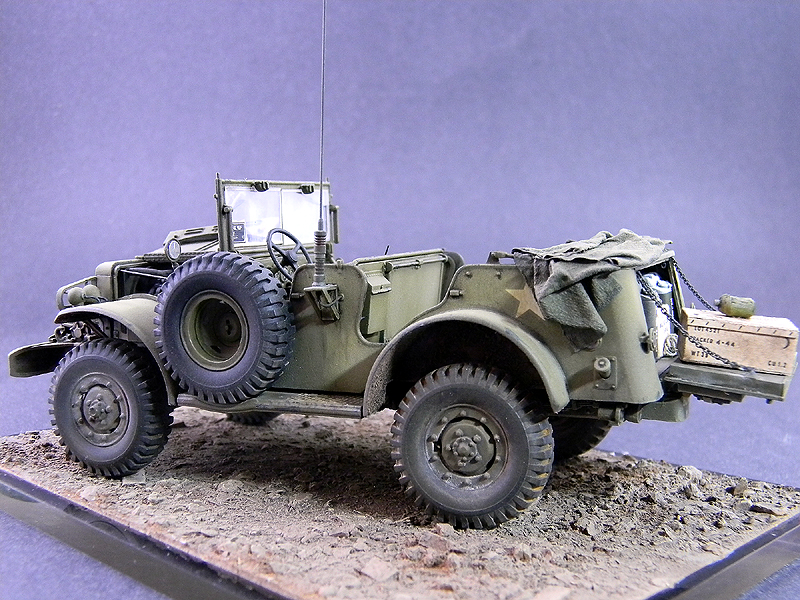
Skybow Command Car. Most fun was adding seat
back spring detail - seen in the photo of
the rear, through the open trunk. I made the
springs out of .020" solder weaved through
my hair comb. There's high-tech for you!
 There's
virtually nothing in the way of pitfalls or
gremlins to warn you about in building this
model kit. I only can recommend taking your
time and patience in executing both assembly
and finishing. There's
virtually nothing in the way of pitfalls or
gremlins to warn you about in building this
model kit. I only can recommend taking your
time and patience in executing both assembly
and finishing.
I
returned to this model in the Spring of 2004
to clean it up. I decided to disassemble it
and repaint it for a fresher and different
look. Now, Skybow's molds have been
purchased by AFV Club and are often found at
a cheaper retail price. This is even better
because it is a fine kit for softskin fans
in the armor modeling community. For this
rebuild, I deleted the older images and
replaced them with new ones.
I did
add some additional small details to the
refurbished model - listing them here on the
new pages. I originally intended the model
to represent a vehicle shortly after the
Normandy Landings in 1944. I wanted a
general service truck, and since relatively
fresh from the landings - not too distressed
and worn. I decided to keep to the general
theme, but added more wear and gear to
communicate this idea better for the
observer. I don't think I accomplished this
theme four years ago when I first completed
the model.
Since
the original model was built, I tried to
confirm the vehicle's numbers as offered by
Skybow. Strictly speaking, I couldn't find
photos of #204377 as part of the 82nd and
marked as HQ-61. I have seen the famous
photos of HQ-61 - but this truck is not
#204377. Perhaps this truck was marked as
HQ-61 and lost, replaced by the vehicle in
photos. I really don't know for sure. I
decided to press on anyway - the model is
fun to work on!
Disaster
struck shortly after cleaning up and
restoring my miniature - thinking I had
placed it in a secure place while working in
the garage, it got knocked off a high shelf
and destroyed. The second time I lost a
model like this, I set out to rebuild it. I
really like the Skybow kits - you've gotta
to go around the block with one like this.
So, I reformatted the previous pages that
covered the build, and tried not to repeat
coverage of modeling portions of the kit
that I had to do more than one.
What
makes an effort like this easier is keeping
detailed notes and photos on the original
build. Today's digital cameras make this
easy. I also keep the original paint batches
(mixing more than what I need) marked and
stored. The original colors I had used in
2000 were fresh and ready to use for both
building sessions in 2004 - simply thinned
and stored in Badger 3oz. paint bottles.
Keeping them in darkened, cool conditions,
helped extends the life of the paint. Photos
shown here are of the original
miniature,with the Gallery Page linked to
show the restored miniature.
Fast
forward to July 2012. Times change. Cameras
get better, models and supplies get better,
hopefully you get better at your craft too.
But, you would think that I had learned to
leave some things well enough alone...
I took
this model out of the display case because I
wanted to fashion a simple earthen base to
help protect it. I had kept it loose in the
case, and over the years it took more than
it's fair share of knocks and nicks as I
bumped it around whenever I went into the
case to retrieve another miniature. This
time, I took it out and set it on the
workbench - intending to get to it later
after I finished up other miniatures - when,
I noticed something odd. The Radio Antenna
was laying on the side of the model truck,
snapped off I know not how nor when.
A bit
miffed and puzzled, I proceeded to reattach
the Antenna. In drilling out the Mount's
hole - the Mount itself then broke off the
rack of the sidewall of the model truck.
When I
bent down to retrieve the Mount off the
floor (thank God I no longer have carpeting
and a hungry resident Carpet Monster to
worry about) I set the Skybow model down too
hard on the workbench - snapping part of the
Rear Axle and jostling loose the Brake
Pedal.
Setting
out to fix these things wasn't too bad, and
I didn't get upset since I inflicted them
"Godzilla-style" in my clumsiness. As I set
out to repair the damages, I decided to
rework one thing, which led to another, and
another, and so on until I found myself
three days later having refinished and
upgraded the whole miniature. I did finish a
suitable display base along the way to mount
the miniature and hopefully protect it from
me for another five or six years...
|

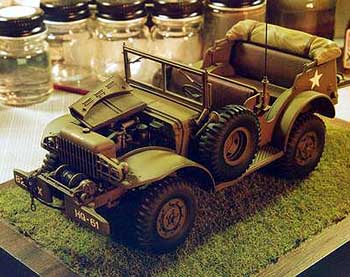
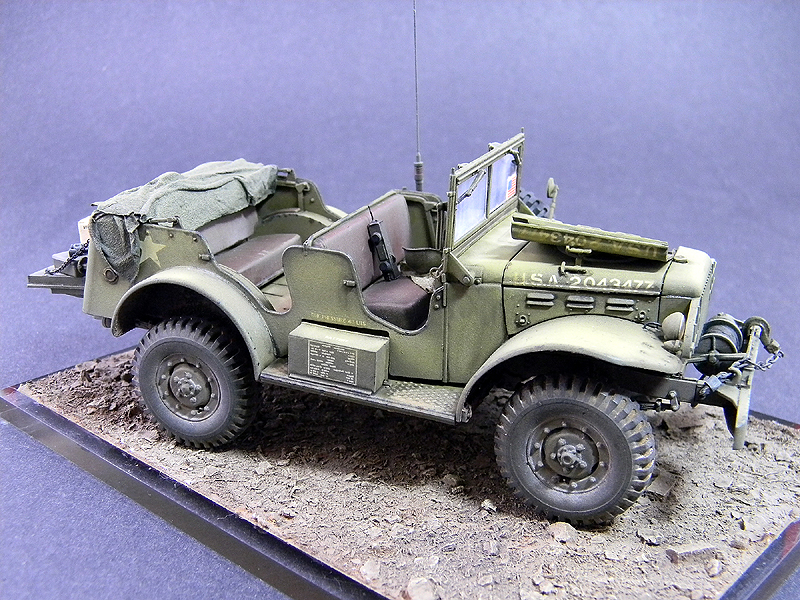
 Above
and below are views of the first miniature.
Instead of festooning it with a lot of
excess equipment (junk) I displayed it like
this to show the vehicle's lines. In keeping
with the leather seats, I painted 3M Post It
Notes paper Tamiya Red Brown and weathered
them the same to use as straps to secure the
canvas top. The arm rests (rear seat - on
the wheelhouses) were commonly wooden items.
I chose not to replicate this detail in the
original miniature. I did add this detail in
the rebuilt model, however.
Above
and below are views of the first miniature.
Instead of festooning it with a lot of
excess equipment (junk) I displayed it like
this to show the vehicle's lines. In keeping
with the leather seats, I painted 3M Post It
Notes paper Tamiya Red Brown and weathered
them the same to use as straps to secure the
canvas top. The arm rests (rear seat - on
the wheelhouses) were commonly wooden items.
I chose not to replicate this detail in the
original miniature. I did add this detail in
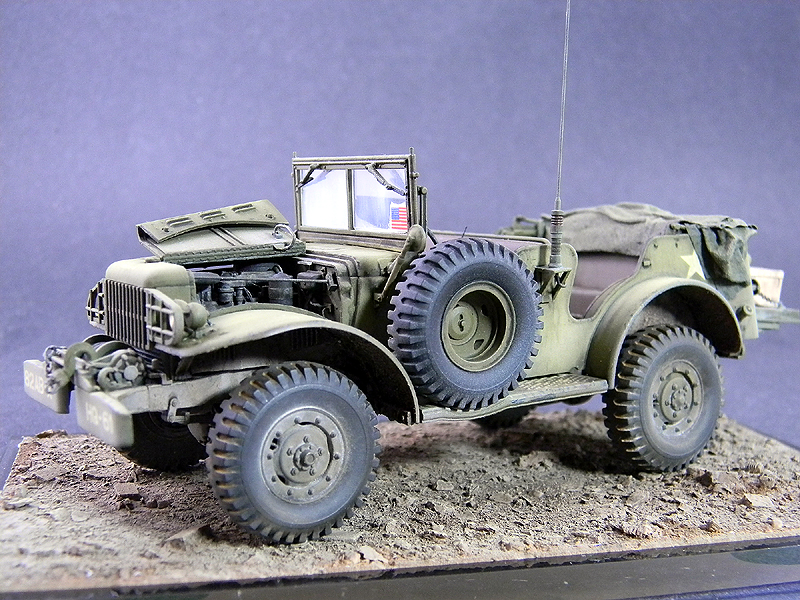
the rebuilt model, however. For
a change of pace I decided not to paint the
ubiquitous windshield wiper arcs on my first
go-around building this model kit. In
retrospect, even this small detail feature
perhaps meant more in conveying the final
miniature's presence than I initially
thought. Though I wanted to model a vehicle
used more in the rear areas - and one
regularly maintained and cleaned - more
"use" would have been convincing to the
observer.
For
a change of pace I decided not to paint the
ubiquitous windshield wiper arcs on my first
go-around building this model kit. In
retrospect, even this small detail feature
perhaps meant more in conveying the final
miniature's presence than I initially
thought. Though I wanted to model a vehicle
used more in the rear areas - and one
regularly maintained and cleaned - more
"use" would have been convincing to the
observer.