|
Like
the Tamiya M41 Walker Bulldog, I delayed
building the Italeri M24 Chaffee Light Tank
mostly because of how many "experts"
complained about the model kit's
shortcomings. After having so much fun with
the M41A1 Walker Bulldog, I set out to
finish a Chaffee the following month. I did
so in the same time frame - two weekends -
and had as much fun with the miniature as I
did with the M41A1. Some of these oldies are
diamonds in the rough, and if you give it
some careful attention you'll get a
miniature as fine as any available on the
shelf today.
I
chose to use On the Mark Models' M24 Chaffee
brass detail set, plus a Jordi Rubio
turned-aluminum barrel (because my kit's
example was warped beyond usability). I made
the lift rings and grab handles with solder.
Aber brass Narrow Weld Beads and Grandt Line
bolts came in handy. I also made hex bolts
by slicing off the ends of Plastruct styrene
.040" hex rod.
Modeling
a Korean War Chaffee, I relocated the .50cal
tripod mount to the front of the turret.
And, lastly, I replaced all the molded-on
tie-downs with On the Mark Models and
Kendall Model Company brass tie-downs.
Verlinden Productions resin Antenna Mounts
and Minimeca Modelismo Antenna Wire would
come into play here too, as well as MV
Products Lenses for the Headlight/Blackout
Lights.
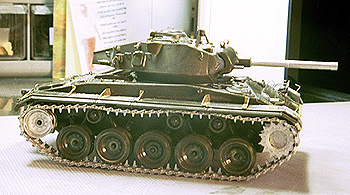
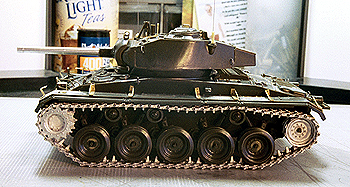
Lastly,
but certainly not in the least, I fitted
Fruillmodelismo metal T72E2 individual
track-links, Drive Sprockets, and Idler
Wheels to my M24 miniature.
This
is an expensive, and time-consuming addition
to the model, but the result is well worth
the patience and effort. I was punch-drunk
enough after "knitting" them together to
purchase another set to complete my M19
Motor Gun Carriage conversion of a spare
Italeri Chaffee model kit. Since I was at it
- I replaced all the molded-in tie-downs on
the little Chaffee model kit too. Not
visible in the below photos are the brackets
for the sand skirts. I would mount these
after painting and attaching the tracks and
running gear. These flimsy sheet metal items
quickly got torn away from the tank during
the normal course of duty, but I applied
them because I didn't remove the molded-in
attachment runners on the sides of the
Italeri fenders. Also, I like the look of
the detail to make this miniature unique.
Neither did I attach my scratchbuilt
External Interphone Box to the right rear
fender, nor the scratchbuilt Spotlight to
the Turret Roof in front and to the left of
the Commander's Cupola prior to painting the
rest of the vehicle. I was concerned that
these delicate subassemblies would get
knocked off the miniature during the
painting process. Likewise, Skybow's .50cal
Machine Gun and associated equipment, Jerry
Cans and their holders, and a spare .50cal
Machine Gun and its equipment were painted
and finished separate from the main
miniature to be attached in the end
assembly.
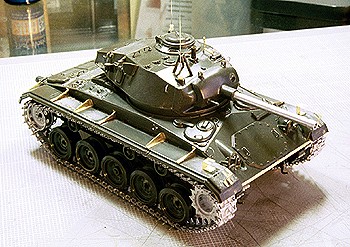
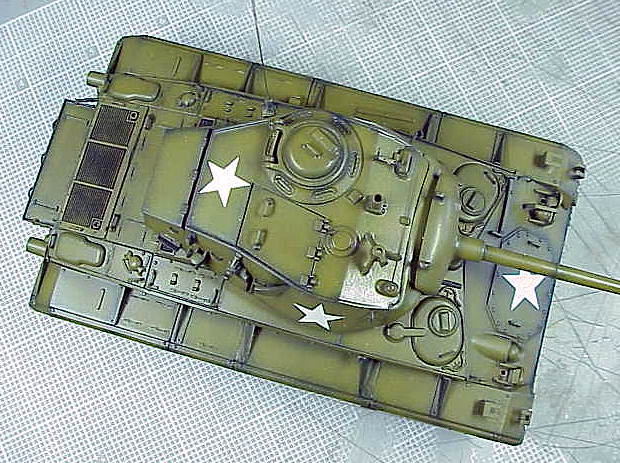
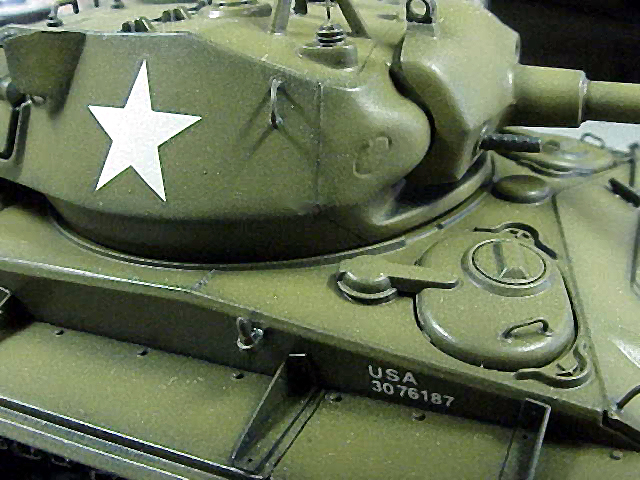
At
right are in-progress shots of the miniature
glossed for decaling. The National Insignia
are Italeri wet-decals, which are thin and
went on without a problem. The Unit Codes
are Pre-Size dry-transfers applied to clear
decal trim film and applied like a
traditional water-slide decal. The M24's
Registration Numbers comes from Railroad
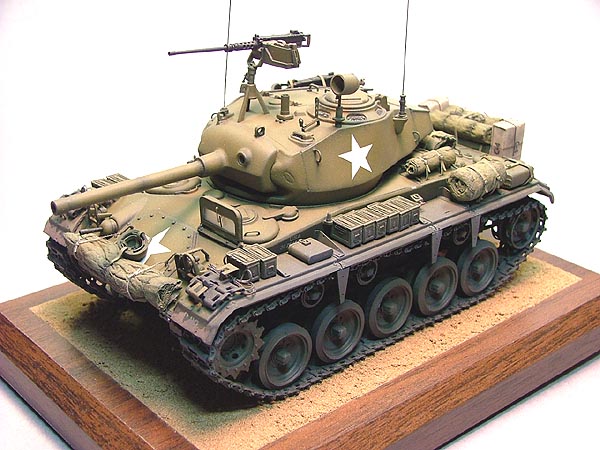
Scenics dry-transfers, again applied to
clear decal film for application as a
water-slide decal. Here, I'm modeling a M24
as deployed with the 25th Infantry Division,
25th Reconnaissance Company in the summer of
1950, accounting for its near-pristine
condition. It hasn't been bloodied yet.
Like
the model itself, the stowage and equipment
for the M24 Chaffee are little projects in
themselves. Next, I'll DullCote the model
and begin applying them. The M24 Chaffee had
little to no room internally for the crew to
stow their gear - so it lived on the tank's
exterior. I spent nearly as much time on the
stowage and external equipment as I do in
finishing the principle miniature. I believe
this makes a big difference in how a
completed projects comes out - as no amount
of extra "stuff" will make a poorly
constructed miniature look good, and no
excellent miniature can overcome shoddy
external stowage and extra equipment.
The
miniature's Registration Numbers were made
with Railroad Scenics dry-transfers. These
are so small, I applied them to clear decal
trim film first - as lining them up from the
dry-transfer sheet itself would be
ludicrous. Once the dry-transfers are
applied to the clear decal film, I mist a
light coat of GlossCote over them. Let it
dry, then trim and apply them like
traditional water slide decals.
The
equipment and personnel gear for my
miniature came from digging deep into the
spare parts box(es). I used a couple of the
marvelous resin AP Bayardi Jerry Cans and
placed them into On the Mark Models' brass
Jerry Can Holders. Paper straps made from
painted 3M Sticky Notes and On The Mark
Models' brass buckles finished them off.
Verlinden .50cal and .30cal resin ammo cans
are stowed on the fenders. I make my own
rope bundles out of nylon string, dipped in
a thin solution of Ivory Black oil and
Turpenoid. For want of putting these things,
I stowed them behind the spare track links
on the front ends of the bumpers. The Tow
Cable is painted nylon string too.
I
revised the normal stowage pattern for the
Pioneer Tools and I relocated the Camouflage
Netting Bag to drape over the front glacis
plate. Pre-Size C4 and C5 Rations are stowed
to either side of a scratchbuilt Vehicle
Equipment Locker I made for my imaginary
crew. The C Rations are bound with .0075"
gauge black wire. All the tarpaulins are
made from Facial Tissue. The headlights for
this model are MV Products #LS19 Lenses. The
additional nut and bolt details are a
combination of punched disc, "salami-sliced"
styrene round rod & hexagonal rod,
Verlinden resin nuts, and Grandt Line nuts,
bolts, and wing nuts.
The
Vehicle Equipment Locker, as I call it, was
a simple box made from sheet styrene and
detailed with Eduard stainless steel hinges
and On The Mark Models' Latches. I made the
hasps out of .015" solder bent around my
needle to unclog the liquid cement
applicator. Little details like this are fun
to add leisurely to the miniature.
Especially so, as the small overall size of
the Chaffee Light Tank lends itself well to
the "little things" modelers can to to it.
The tiny details don't get lost on a large
miniature. Lastly, I added an On The Mark
Models Padlock to one of the hasps on the
Vehicle Equipment Locker.
The
spare .50cal Machine Gun and its associated
equipment would be stowed in the traditional
place on the rear right side of the Turret.
Again, early Korean War, and my
Reconnaissance Company would field a quite
heavily armed M24 Chaffee. Verlinden's resin
.50cal MG from the old #372 set would be
used here. I assembled the kit per the
instructions, however, I cut the barrel away
from the cooling jacket - as the MG was
stored broken down. I drilled out the face
of the cooling jacket. I used a spare .50cal
MG barrel for the old Tamiya WW II US
Infantry Set - you know the one cast in the
icky silver plastic! I cleaned up the
plastic part and drilled out both ends.
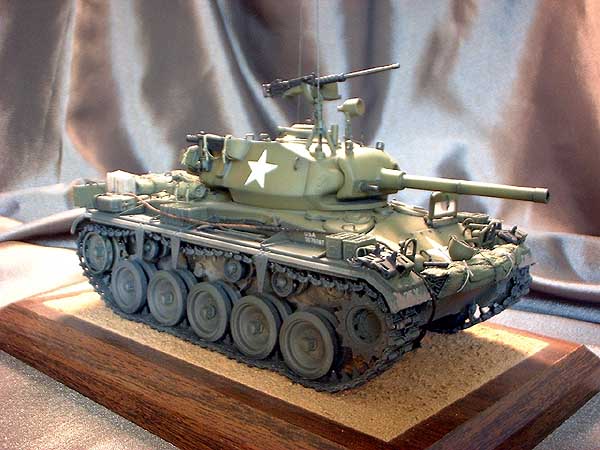
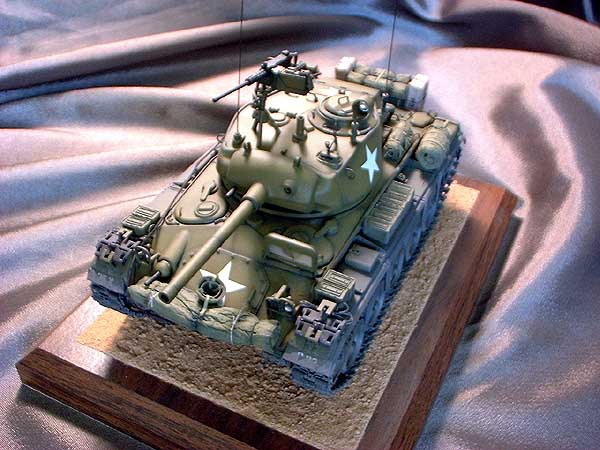
My M24
Chaffee is finished in Tamiya Acrylics - my
usual. The Olive Drab is custom mixed. The
lower hull and running gear is sprayed with
a "dirty" mixture of Acrylic Flat Black with
a touch of Buff, thinned 80% with used
Acrylic Thinner. The mud on the sides of the
lower hull between the running gear is
Hudson & Allen's excellent Mud mixture.
To this I added a lot of clippings of Hudson
& Allen's Fall Grass - as I envisioned
my M24 Chaffee has having run through muck
and rice paddies before coming to rest on
the earthen "road" depicted on the simple
display base. To make the mud on the lower
hull appear wetter than the dried mud on the
tips of the fenders, I simply over-sprayed
areas of it with my "dirty" road gear
mixture. I have patches of dried mud along
with wetter mud in different areas of the
hull. This really is easy to do - and the
Hudson & Allen mixture is so thin - if
you're careful you will not obscure
hard-worked detail. I do not go for the
caked-up mud look on an AFV. This product is
wonderful for finicky modelers like me.
All in
all, I strove for a vehicle to reflect the
early days of the Korean War and the typical
pattern of stowage on the M24 Chaffee Light
Tank - without going overboard and
overloading the miniature with "stuff" just
for the stake of adding extra gear. The M24
Chaffee, though an excellent design and
performer, was outclassed during the Korean
War. Having the punch and a variety of
ammunition it could bring to bear on an
enemy, it didn't have the armor plating to
stand up to the T-34 Medium Tank - though I
have difficulty imagining anyone seriously
thinking it could take on the Russian Heavy
on equal footing. The M24 was replaced by
the M41 Walker 'Bulldog' - which my
miniature is here posed with the Chaffee.
These are just two of the wonderful American
Light Tanks from our military history. When
complete, this portrait will include the
M551 Sheridan (the last member of this
family) and the Stuart Light Tanks M5 and M3
(the father's of this family) to show the
evolution of this design concept from World
War II to the Modern Era.
|